Learn How to Create Shared Mailbox in Office 365; Step By Step

Wondering about shared mailbox creation? We have got you covered! This blog helps administrators and users of Office 365 with steps to create shared mailbox in Office 365. The two most common ways i.e. Admin Center & PowerShell, steps are described here. So, let’s start!
Some Important Points Related to Shared Mailbox Before Its Creation in Office 365
Basically, the shared mailbox feature enables a group of people to monitor and send emails from the common mailbox. Before directly jumping on solutions to create Shared Mailboxes in Office 365 accounts, we are going to discuss some important points that a user needs to be aware of.
- This Office 365 mailbox enables users to have a common calendar.
- It is mandatory to have the Exchange online license to work with Shared Mailbox.
- Microsoft provides 50GB of storage space for shared mailboxes. Once the limit exceeds, then automatically the Shared Mailbox gets locked.
- If the “In-Place Hold or Litigation Hold” or “In-Place Archive” feature needs to be enabled in Shared Mailbox then, the Exchange Online Plan 1 or 2 is needed with the Archiving license.
- 100GB space is automatically provided in the shared mailbox if the In-Place archive or the auto-expanding feature is enabled.
- No username or password is needed to work with the shared mailbox. Only a simple account sign-in is required to work with this.
- Users should be granted the required permissions on the shared mailbox.
Here are Some of the Permissions That are Used in the Shared Mailbox :
- Complete Access: In this permission, a user will be acting like the mailbox owner. But, if he/she wants to send the email then, additional permissions need to be provided.
- Send As: Users will be allowed to send emails as shared mailboxes when this permission is granted.
- Send on Behalf: On behalf of the Shared Mailbox, the email will be sent.
How to Create Shared Mailbox in Office 365?
It is quite simple to create Office 365 shared mailbox so that a group can view and send messages from a unique email id, like abc@contoso.com. Whenever an individual of the group gives a reply to the sent message of the same mailbox, this message appears from the shared mailbox itself, not from any specific individual. Well, let us begin with the solution to create this!
# 1: Using Admin Center to Create Office 365 Shared Mailboxes
1. Login into your Office 365 account and go to the Admin Portal
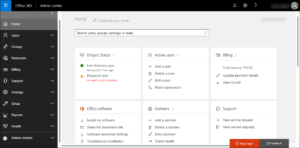
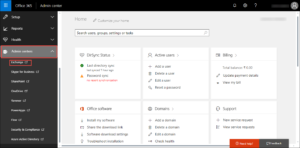
2. Click on Admin Centers >> Exchange to proceed with the creation steps
3. You will be directed to the Exchange Admin Center where you have to click on Recipients >> Shared
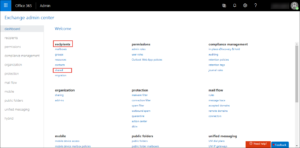
4. This opens a page where you can see icons for the options like add, delete, edit, etc.

5. In order to create shared mailbox in Office 365, click on the plus icon.

6. Now a New Shared Mailbox gets opened
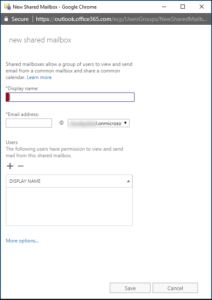
7. Provide the name of Shared Mailbox in the Display Name text box. Mention the email address and add users to it. In the More Options section, enter the Alias for the shared mailboxes.
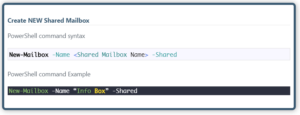
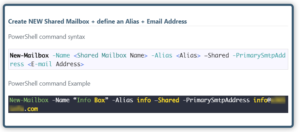
# 2: Using PowerShell to Create Shared Mailbox in Office 365
It is possible to create a new shared mailbox in Office 365 tenant by using the New-Mailbox command. The following command needs to be executed in SharePoint Online Management Shell or Windows PowerShell :
Note: The command will run only if “Multi-Factor Authentication” is disabled. If this is enabled then, use Exchange Online PowerShell Module and use Connect-EXOPSSession for establishing the connection.
Also Read: Increase Office 365 Email Storage – Step By Step Solution
Observational Verdict
A shared mailbox in Office 365 can be quite useful when it comes to managing collaborative tasks within the organization. Therefore in this guide, we have discussed the step-by-step solution for the same using two different methods such as PowerShell and Admin Center.