Increase Office 365 Email Storage – Step By Step Solution

Read this informative blog to know how you can Increase Office 365 email storage without upgrading your existing plans. Sounds fascinating?? Right! Let’s get into it!
Office 365 is full of advantageous email client for business purpose because all the crucial information of the account are secured and accessible worldwide. As many other services have some limitations, Office 365 also has some limitations in its services. If you don’t have a subscription to Office 365 then you can only utilize some of its features and you need to take the subscription to Office 365 to exceed the limitations.
Microsoft provides multiple plans for Office 365 and the size limit of your emails varies according to your plan of Office 365. Such as the E1 plan, has a maximum size limit of 50 GB for every mailbox. On the other hand, E5 has a size limit of 100 GB.
Then what if you have an E1 plan and your email storage limit exceeds 50 GB, and your organization has only two ways left i.e. upgrade the subscription of Office 365 or delete the data from the mailbox. But deleting the data is not an option for others as their email contains very crucial information and also not everyone wants to invest the money on Office 365 subscriptions due to higher costs.
So the question is how you can increase Office 365 email storage or how can you exceed the limit without upgrading the license? In this write-up, we provide you with an amazing solution that permits you to increase Email storage from 50 GB to 100 GB.
Let’s start!How to Increase Office 365 Mailbox Storage Using Automated Tool?
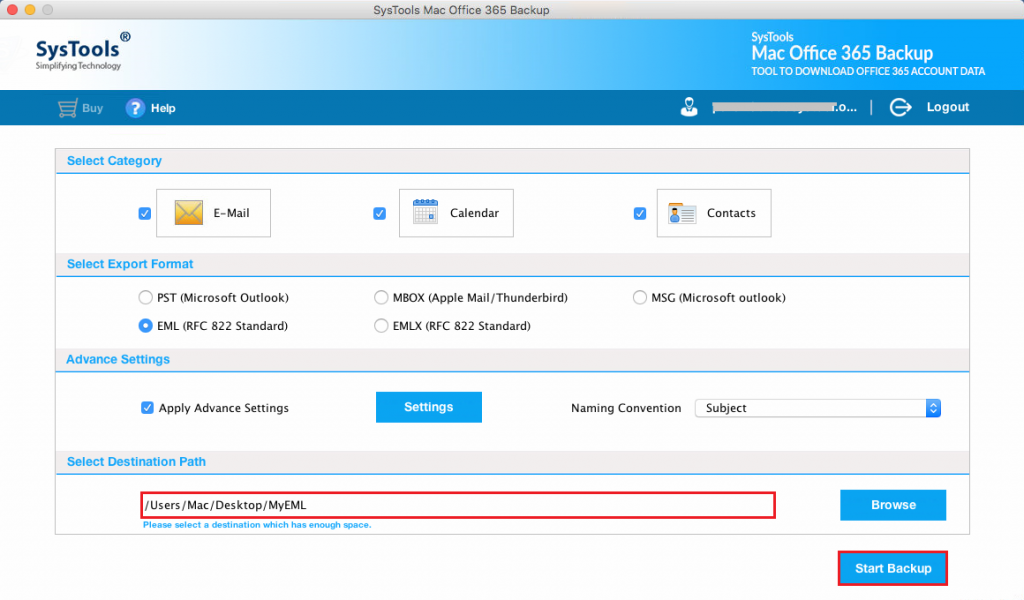
Here we are going to introduce an automated tool that will automatically delete the data downloaded from the server. In the upcoming session, we will discuss how the user increases Office 365 email storage easily.
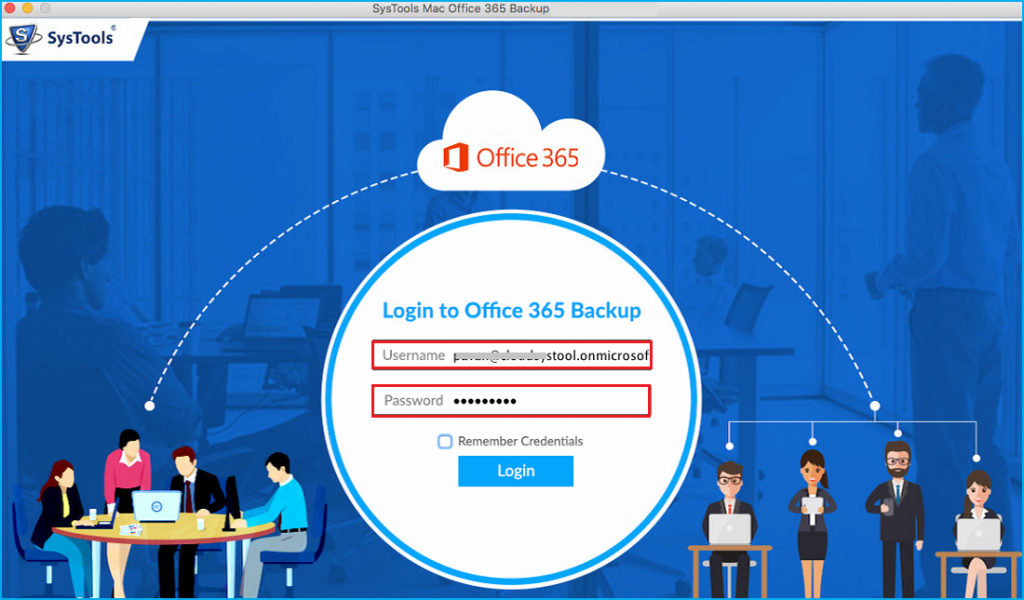
- Download and launch the SysTools Office 365 Backup Tool
- Enter the valid credentials of the user account in the admin panel
- Go to the menu option and choose the Export Format
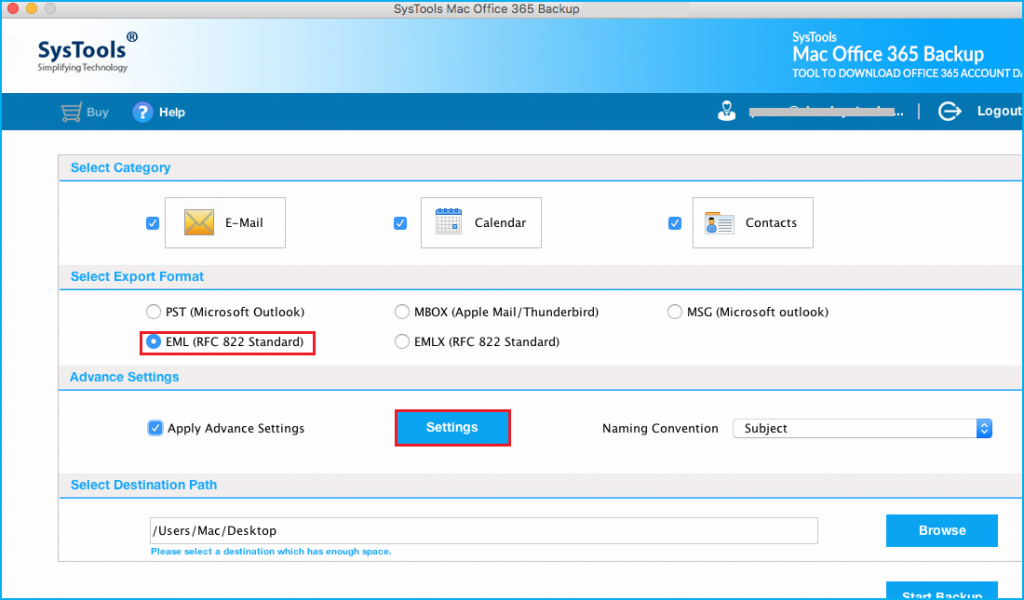
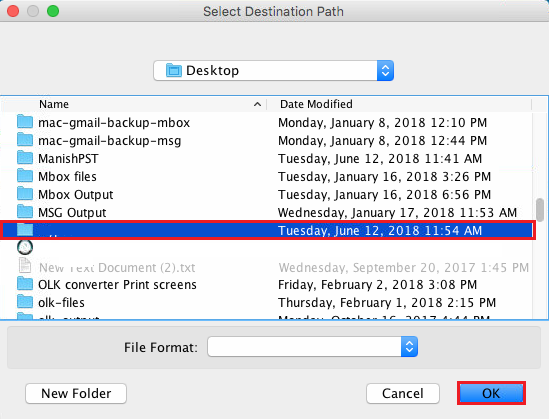
- Browse the destination location for your resultant file
- Click on the Start Backup button to start the process by using the tool one can easily increase Office 365 email storage in a trouble-free manner.
Increase Office 365 Email Storage using PowerShell
The first approach to increase your mailbox size limit is by using Exchange PowerShell cmdlets. But for that approach, you have to run PowerShell as administrator and connect it to the Exchange Online O365 with Windows PowerShell.
Also Read: Perform OneDrive for Business Tenant to Tenant Migration; Simplified Method
Steps to Increase Single User Mailbox Size Limit using PowerShell
- Connect to Exchange Online and launch PowerShell. Then use the below command to increase Office 365 email storage of a single mailbox.
Command: Set-Mailbox <UserID>-ProhibitSendQuota <Value> -ProhibitSendReceiveQuota <Value> -IssueWarningQuota <Value>
Tip: Parameter <UserID> is for user mailbox or email address. <Value> represents the size in GB, MB, or KB.
So to increase the size of 100 GB, you can set the sent limit at 99 GB.
- Then use this command to check the size of the mailbox.
Command: Get-Mailbox <UserID> | Select *quota
In this way, you can extend the limit of a single user mailbox in Exchange Online. If you want to increase the limit of multiple users then follow the given steps:
Steps to Increase Multiple Users Mailbox Size Limit using PowerShell
- Connect to Exchange Online and launch PowerShell. Then use the below command to increase the size of multiple mailboxes.
Command: Get-Mailbox -ProhibitSendQuota <Value> -ProhibitSendReceiveQuota <Value> -IssueWarningQuota <Value>
- One can also apply some additional filters to the Get-Mailbox cmdlet. Below is an example:
Command: Get-User | where {$_. Bureo -eq “Technoreseller”} | Get-Mailbox | Set-Mailbox -ProhibitSendQuota <Value> -ProhibitSendReceiveQuota <Value> -IssueWarningQuota <Value>
In the above example, we use three cmdlets to filter the commands of the Bureau of Technoreseller department. The “Where” parameters define the department where all the operations need to be implemented and “ProhibitSendQuota” defines the set quota limit of the emails of the user.
Note: This software is designed in such a way that one can take the backup of Office 365 user data into 4+ file formats. Then the tool will automatically delete the downloaded data from the server.
Additional Feature of the Tool
- This tool allows you to increase Office 365 mailbox storage by taking the backup.
- Additionally, provide an option of Include Folder option to increase the size of Office 365 by taking the backup of selected emails locally.
- Highly compatible with all the versions of Mac OS.
- Also provides an option of Incremental Backup of your newly arrived data.
- Permits you to Migrate Office 365 to Zoho Mail without any tech support.
Wrapping Up
Increasing the user mailbox size limit in Office 365 is hard to crack when it is close to exceeding the limit of the plan. This can be done by using the way of PowerShell cmdlets. And you can also use the automated solution and backup your crucial data, then delete it from the server which leads to increase Office 365 email storage. This tool is easy to use and one can increase its Office 365 email storage in a trouble-free manner.