Step by Step Procedure to Migrate from Office 365 to Microsoft 365


Office 365 introduced with a new name Microsoft 365 & advanced Office apps, intelligent cloud services, and high-class security service. There are many organizations that are curious to migrate data from Office 365 to Microsoft 365. But the migration between Office 365 to Microsoft 365 is no an easy task, you have to do properly pre-migration steps and make a proper plan before starting the migration. Therefore in this tutorial, we will describe all phases & solutions to migrate data from one Office 365 tenant to Microsoft 365.
Let’s start from the beginning, Organizations have to undergo migration at the time of mergers & acquisitions. In this process, organizations need to perform the migration of user’s emails, contacts, calendars, documents. If there is a need to migrate domain users data then this task becomes more complicated, but we can do the task. As we all know there is no direct solution is available for the migration, so we have to use a third-party tool.
To migrate data from Office 365 to Microsoft 365 we have to go through multiple stages. In the upcoming section, we are going to describe all stages of migration.
Phases to Migrate Emails, Contacts, Calendars, Documents Data from Office 365 to Microsoft 365
Multiple phases involve in this Office 365 to Microsoft 365, but the two phases are most important 1: Preparation, 2: Migration.
Preparation is the pre-migration phase, in this phase, we will prepare the source & destination tenant for the migration. After that, we will proceed to the migration phase to migrate data from Office 365 to Microsoft 365.
Preparation Phase for Office 365 to Microsoft 365 Migration
The preparation phase is important it will help us to segregate user’s data, prepare tenants, a domain. This phase will make the entire migration smooth. The following steps are involved in the preparation phase.
1: Preparation of Domain:
1 – Make sure sufficient space should be available on the destination tenant.
2 – Make sure user mailboxes, resource mailboxes, and distribution groups should be created on destination tenant.
2: Domain Verification:
1: start the domain verification process on target Office 365 tenant.
2: Add the domain and create txt records in Domain Name System for verification.
It can take up to 72 hours, make sure the domain verification process should be completed before performing the migration.
3: Schedule Microsoft 365 Migration
1: To perform a migration between users, first you have to create a CSV file in which you need to maintain Office 365 source & destination users ID.
2: Disable the directory Sync from the source tenant.
After that move on the second phase that is the migration process.
Perform Data Migration between Office 365 to Microsoft 365
To migrate data from Office 365 to Microsoft 365 users need to use SysTools Office 365 to Office 365 migration tool to smoothly perform cloud to cloud migration. This will simplify all the complications of Office 365 to Microsoft 365 migration & migrate entire data from source tenant to destination tenant. This is the best tool for the Office 365 administrator who’s facing the complications to manage multiple tenants of a single organization.
The tool provides many advanced features like delta migration to migrate newly arrived items, the Set priority of accounts, Multiple Office 365 project migration at a time, concurrent migration, etc.. some highlighted features of the tool are given below –
1: Migrate user’s emails, contacts, calendars, documents from Office 365 tenant to Microsoft 365.
2: Data-based filter to perform migration only selective data.
3: Import CSV file to create a mapping between source & destination users.
4: To set the priority of accounts to migrate the first tool provides an account-based priority option.
5: 3 Re-run migration options – 1: Retry Failed Items, 2: Full Migration, 3: Delta Migration.
6: Tool is capable to perform user’s data migration from Office 365 tenant domain.
7: Support multiple Office 365 project migration at a time.
Let’s Start Migrate Data from Office 365 to Microsoft 365 – Working Steps
Users need to full fill some prerequisites of the tool, before starting the migration –
1: Source & destination Office 365 Admin credentials are required.
2: Create a project in Microsoft Azure, allow permissions and generate Application ID.
After that follow the given steps to accomplished migration task.
1: Start software then select Office 365 as a source and as a destination.
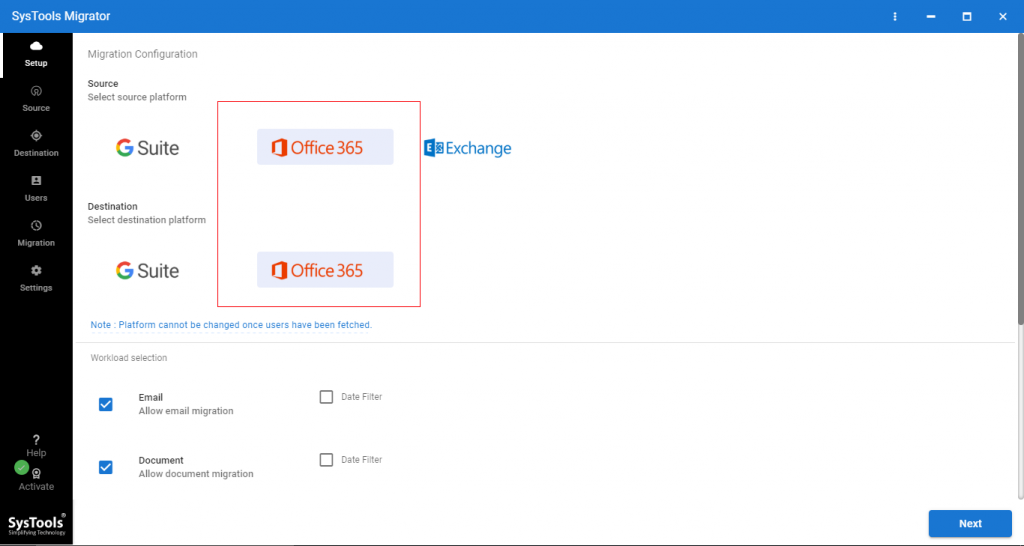
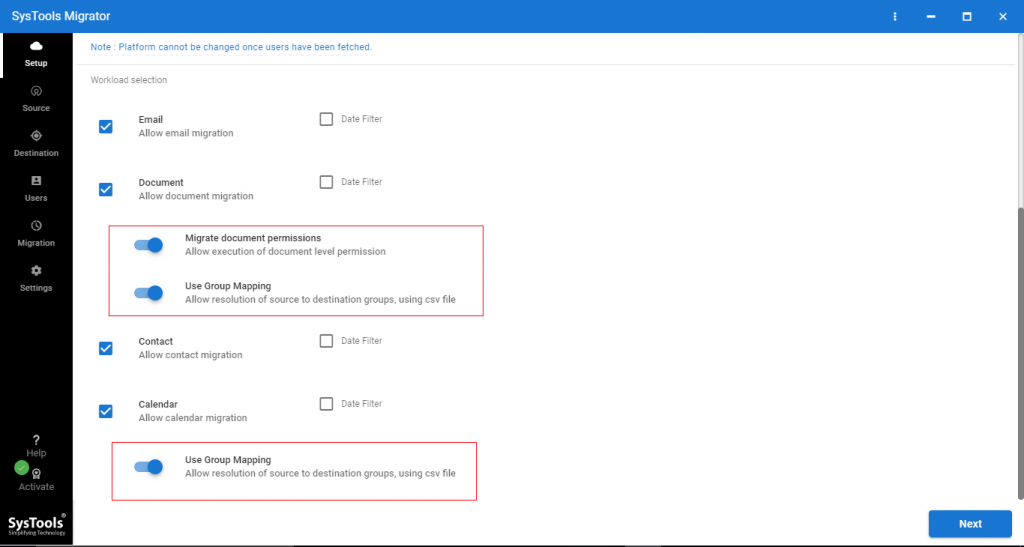
2: Select the items (emails, contacts, calendars, documents) which you want migrate from the Workload Selection.
From the same screen you can apply Date-filter, Migrate document permission, Use group mapping.
After selecting options click on Next.
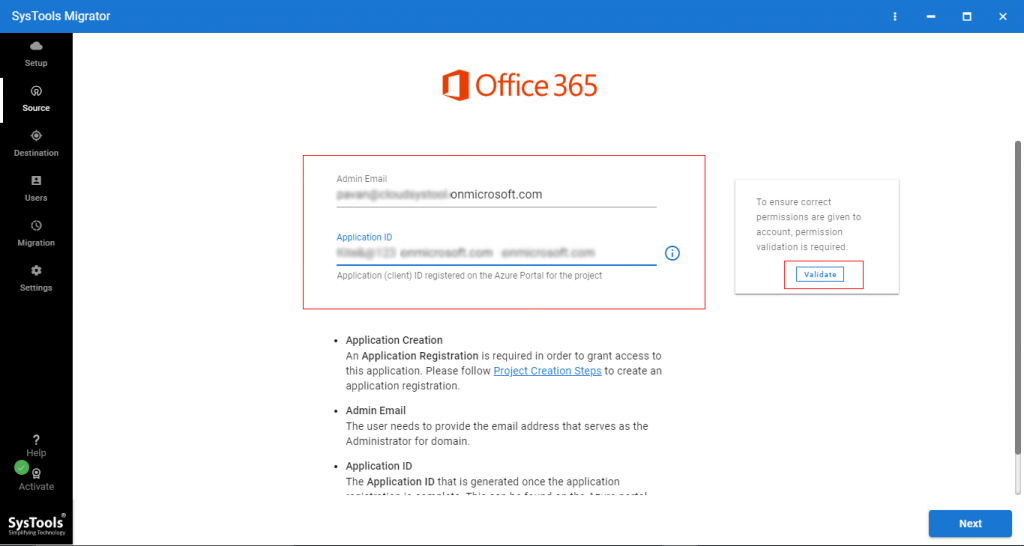
3: Now, enter source Office 365 Admin ID & Application ID, then click on validate button to validate permissions.
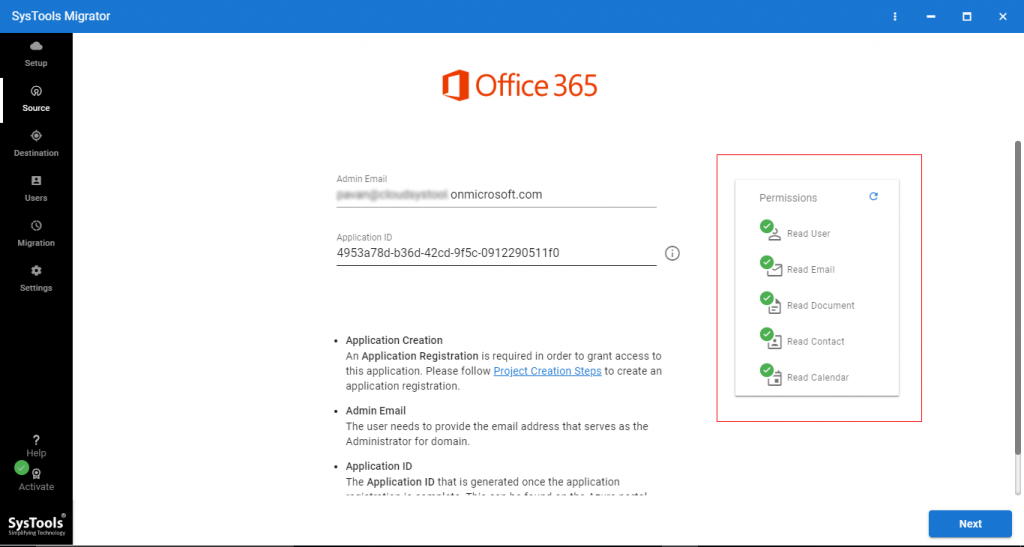
4: After validating permissions, click on Next.
5: Enter destination Office 365 Admin ID, Application ID, click on Validate button.

6: Once permissions are validated click on Next.
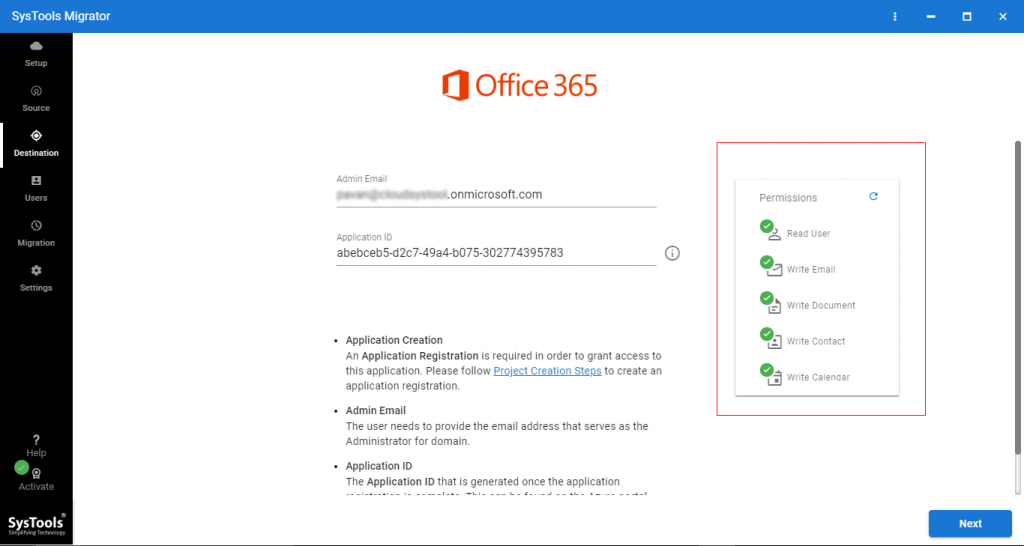
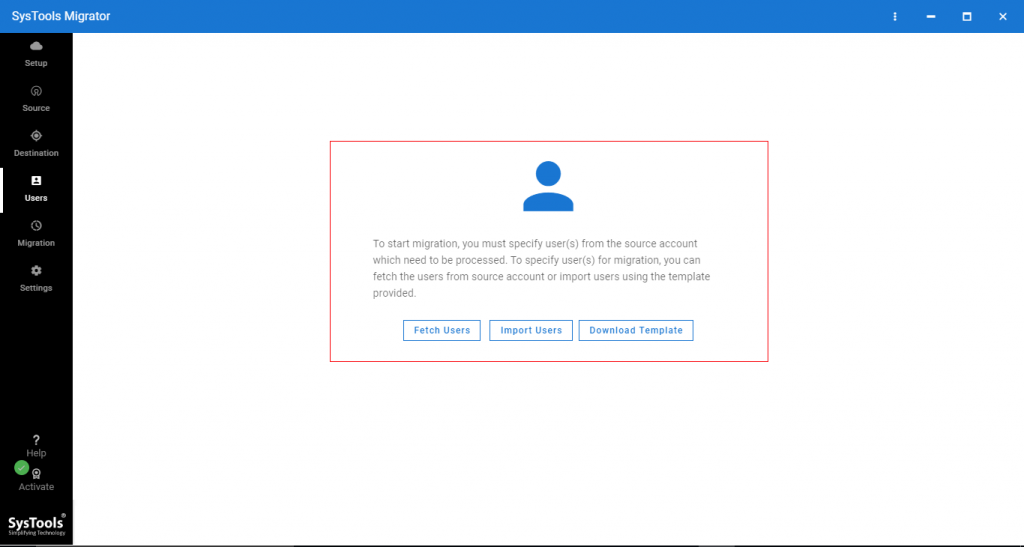
7: Now, we have to create mapping between source & destination users. To do this task tool provides three options – Fetch Users, Import Users, and Download Template. Select anyone and proceed to next.
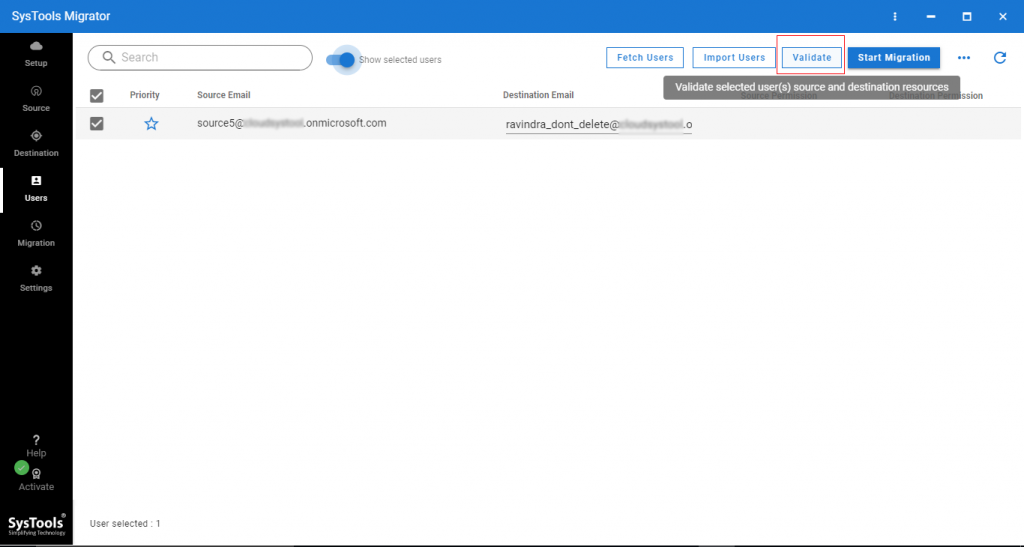
8: Mapping is successfully created between source & destination users now click on Validate button.
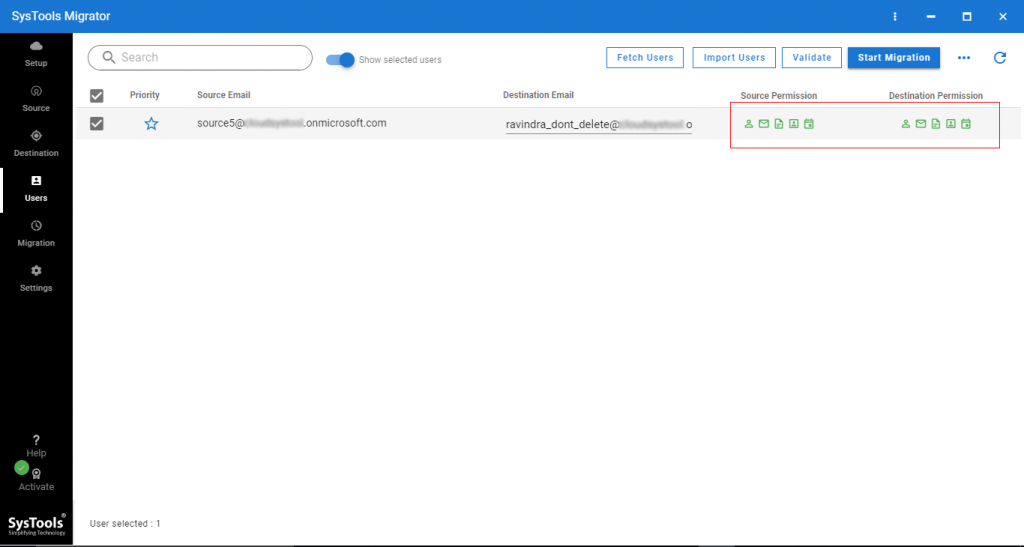
9: After validating permissions click on Start Migration button to migrate data from Office 365 to Microsoft 365.
Conclusion
If users doesn’t know the right solution to migrate data from Office 365 to Microsoft 365 it will create complications. Therefore, in the above article, we have described a method to simplify the complication of Office 365 to Microsoft 365 migration for the organization. To successfully accomplish migration users have to follow each & every step carefully.