Microsoft Teams Migration Project Plan & Checklist for Error Free Migration

Article Abstract: Are you planning on migrating your data between Microsoft Teams? Then, this post is for you. Since transferring data from one Teams to another is a complex task to achieve, we’ve come up with the Microsoft Teams migration checklist for you. This will guide you and help you accomplish the goal smoothly.
In the past couple of years, we have seen that everything can change at the drop of a hat. And, during the tough time, many enterprises, especially the business industries have to go through changes to keep their business running.
So, most organizations adopted Office 365 suite to provide their employees with a collaborative work environment. And, Microsoft Teams being an essential part of the Office suite not only made it easier to communicate and share information but actively shaped the way of working.
However, in urgent situations like mergers or acquisitions, or re-structuring the existing Teams, in either case, data migration is necessary between MS Teams. Hence, the goal here is to guide you to complete a seamless migration by following the given project plan.
Also Read: A Guide to Migrate Microsoft Teams from One Tenant to Another Safely
What Are The Crucial Components Of the MS Teams Migration Project Plan?
As you know, Microsoft Teams stores its data in various places instead of a common location. This is why it becomes challenging for the admins to carry out Teams to Teams migration.
But, don’t worry, if you look at the important components before beginning the actual migration process, it will be really easier for you to execute a smooth process.
The first and most deciding element is planning. So, according to your organizational needs, you have to choose your strategy. Whether you want to run a single event migration or a phased migration.
Usually, the single event migration is recommended if you have less than 15000 users to migrate. And, it also comes with a higher risk. On the other hand, a phased migration is a gradual process, has a positive user experience, and involves lower risk but takes more time to complete.
Now, let’s come to the next important element; choosing the right support and tool to win over the challenging task.
With the right tool like SysTools Microsoft Teams Migration Tool, it can boost up the process and make it simpler to move your important documents and emails.
However, before utilizing the tool to move your data to the new account, use this Teams migration checklist and transform your migration project plan immediately.
Keep Track of Every Detail With The Microsoft Teams Migration Checklist
Whenever opting for a Microsoft Teams migration, keeping a checklist handy could ensure there are no glitches in between the process.
And, the key to accomplishing a successful migration is to implement it in stages. So, here are the top 6 stages you should consider before going for the data transfer.
Plan for The Plan:
It is always good to preplan the whole migration process before undergoing it. Ensuring all the necessities beforehand such as whether the source and destinations are ready for migration, you have licensed MS Teams with users set up, etc could avoid complications later. Also,
Take Inventory of MS Teams Data:
List out everything that exists in your Teams environment so that you will get an overall idea of what you are handling. It will also help you know the existing content whether it’s fresh or duplicate.
Get Rid of Unnecessary Data:
Once you identify the duplicate data, the content that’s no longer up-to-date or valid, etc, hanging on to them is of no use. So, it’s advisable to discard the irrelevant data so that you can start creating fresh content in your new Teams environment.
Put a Hold On Teams Usage During the Migration:
To set everything right, a non-altered Teams Migration environment is preferred. Because Teams usage during migration can lead to data alternation in users, group names, channel permissions, etc.
So, It is always a good practice not to use or update the Teams while the migration process is going on.
Don’t hurry and Give Enough Time for Migration:
You know Teams migration can be tricky and time-consuming. Hence, to ensure a successful data migration from your existing account to a new one, you have to devote ample time.
Microsoft Teams Migration Checklist for Post Migration:
This is the stage that you will ensure after completing the migration process. Give it some time to sync and check whether the changes are reflected on the destination.
Now, what to do after applying all the above agenda?
It’s simple, take the help of the tool and implement the below steps to successfully perform the Teams migration.
Bring The Microsoft Teams Migration Project Plan into Action By Using The Tried and Tested Software
As a matter of fact, Microsoft doesn’t offer any direct method to carry out the Teams migration. Even, the tech giant itself recommends using a trusted tool to execute the same.
Moreover, through this software, you can perform various operations. Such as;
- Move Teams, Channels, Channel chats, Links, Files, Members, Permission, Chats with the actual timestamp, etc.
- Just log in with your Admin account and Migrate Teams data in bulk
- Re-try the migration of failed items with ‘Re-run migration.
- Transfer newly arrived items with ‘Delta migration’
- Get a detailed summary report mentioning the number of channels migrated, the name of channels, etc.
Also Read: How to Copy a Channel in Microsoft Teams? Learn the Best Way
Step by Step Guide for a Successful Microsoft Teams Migration Project Plan
Now, let’s have a look at the working procedure of the software.
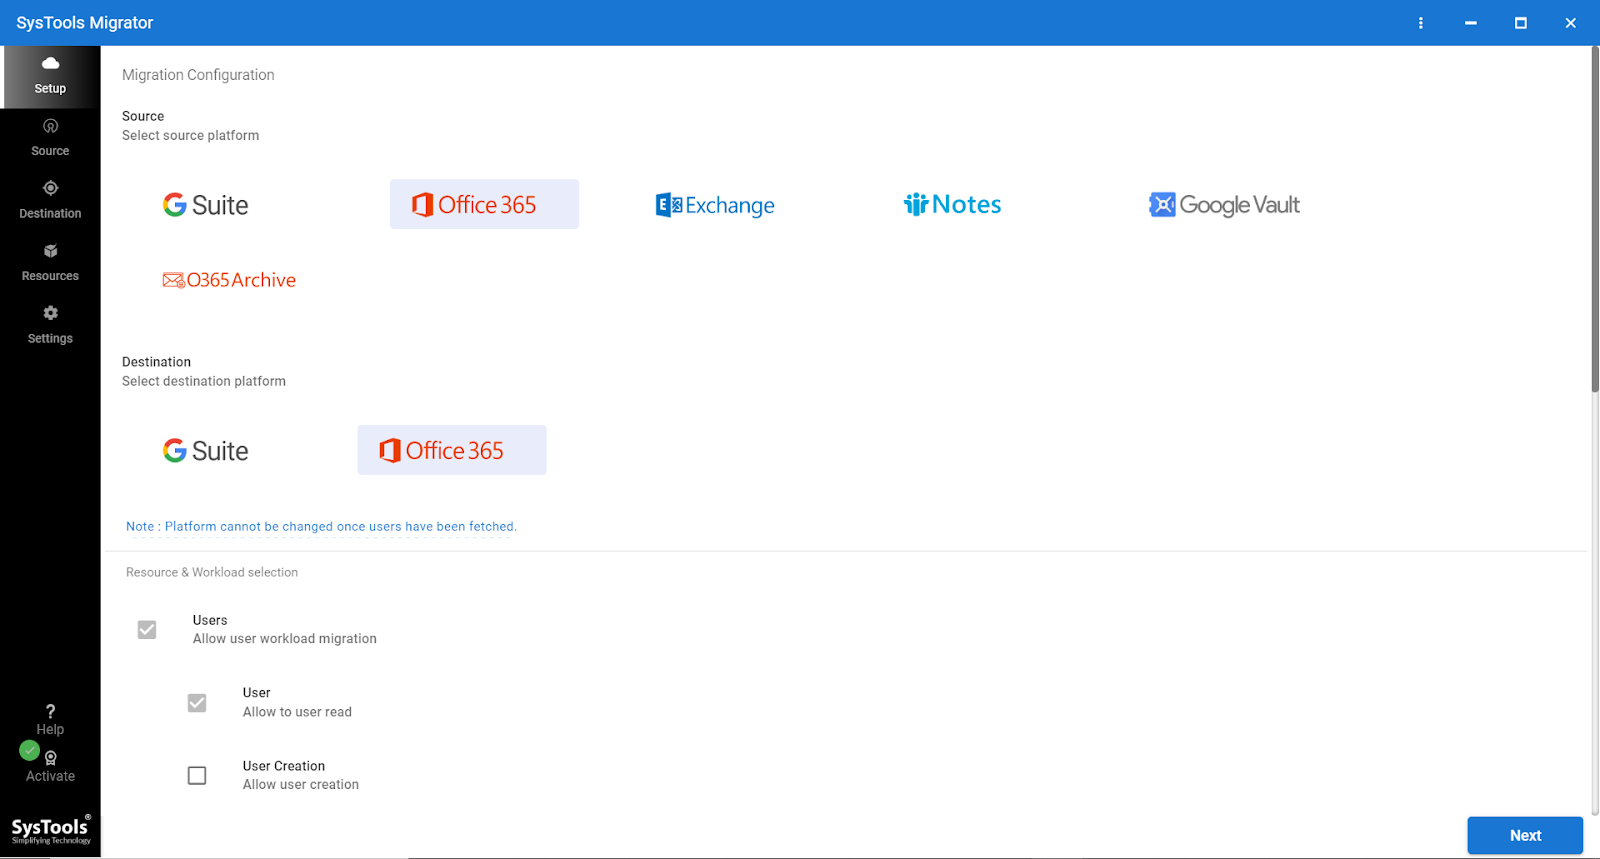
Step-1: Download the Teams Migrator and run it on your system. Then, choose Office 365 as both Source and Destination.
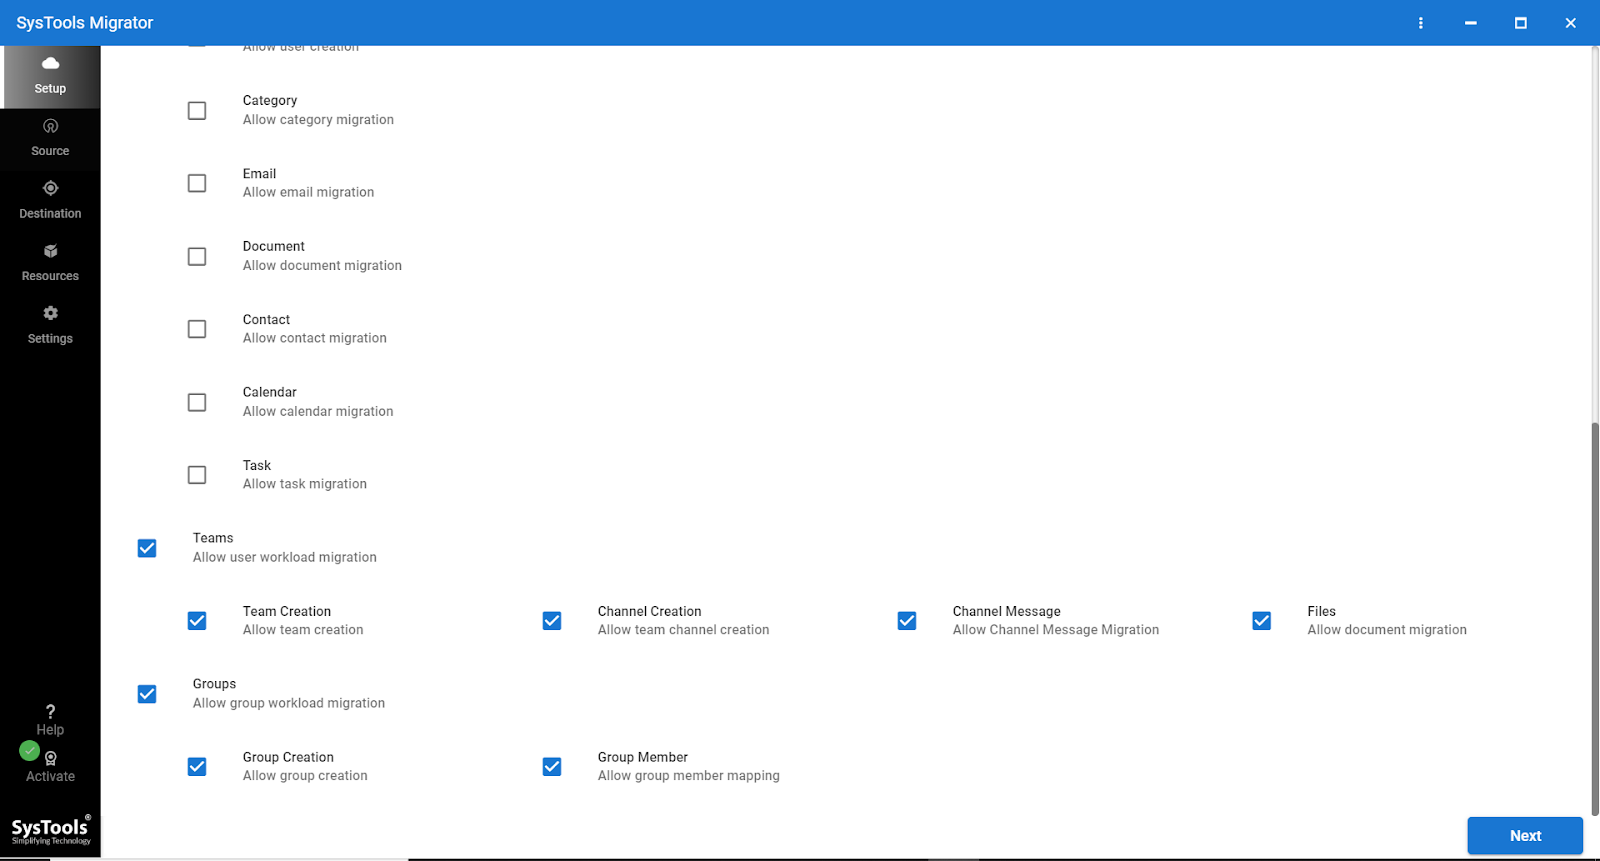
Step-2: Scroll down and tick the Teams checkbox. It will enable team and channel creation. Also, mark the “groups workload migration” if you wish to migrate the same.
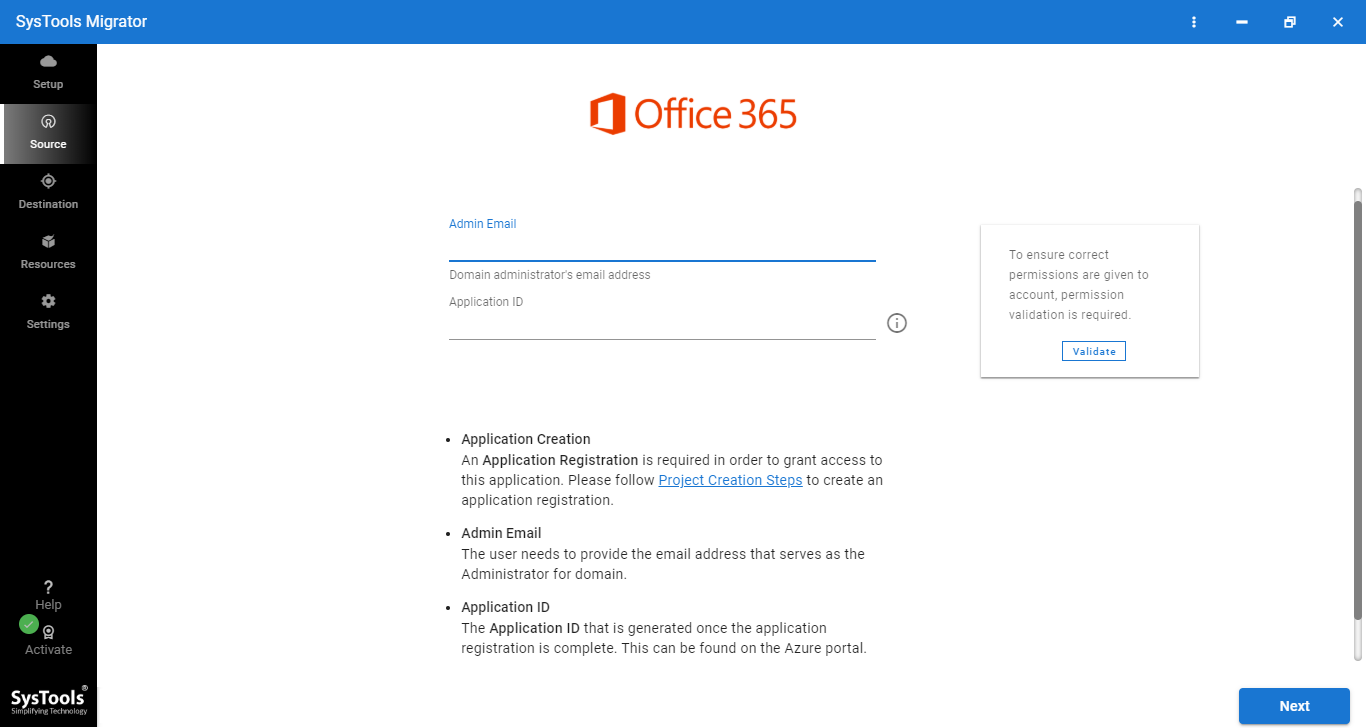
Step-3: Next, provide the Admin Email and Application ID for Office 365 admin account in both source & destination tabs.
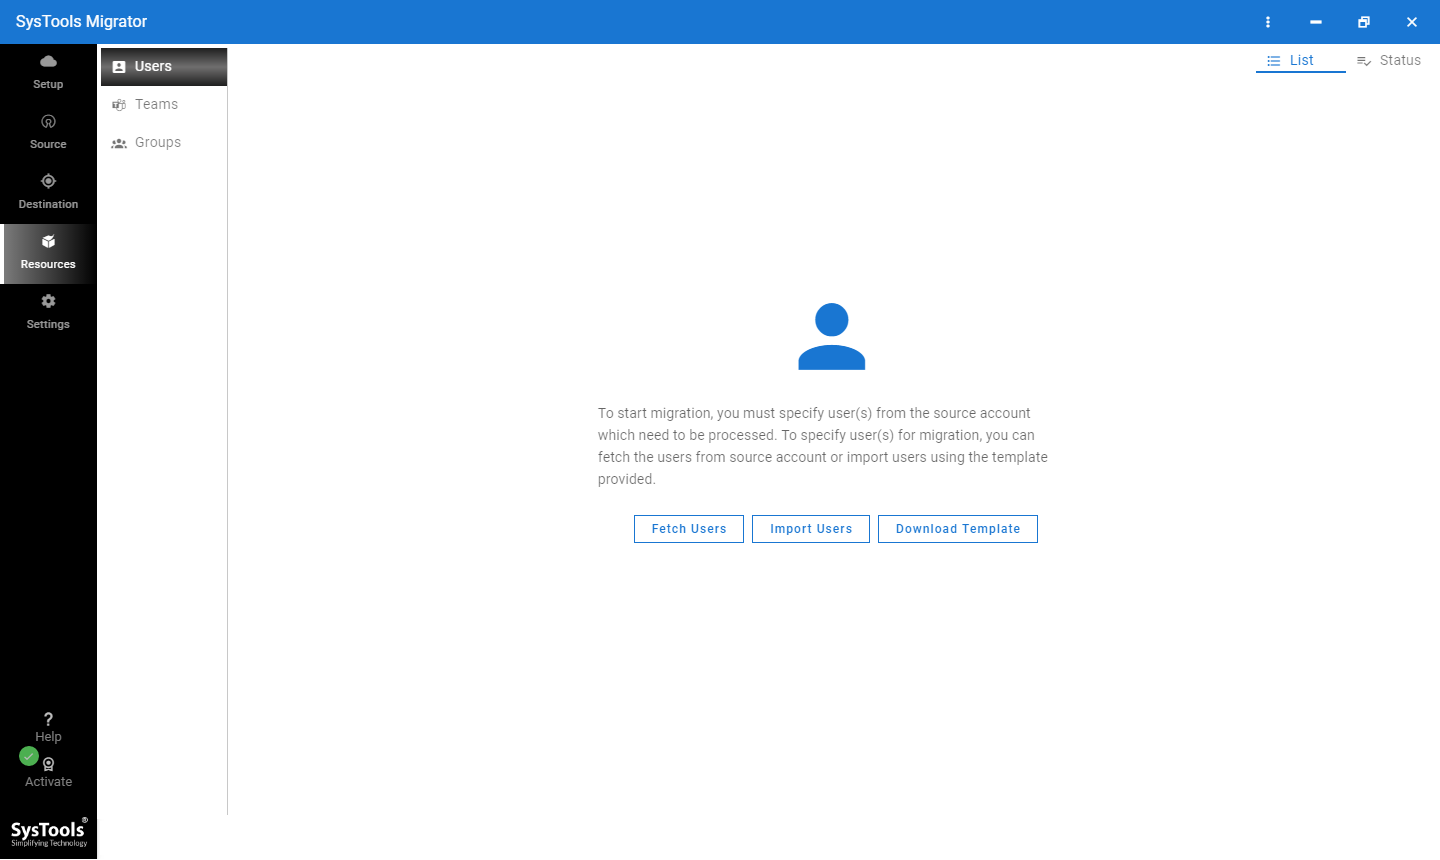
Step-4: Through Fetch Users, Import Users, or Download template options add users. And, validate the users’ permissions in the required places.
Step-5: Then, you have to create the Teams for your destination accounts and provide destination names.

Step-6: Validate the permissions and click on the Start Migration to begin the migration.

Step-7: Now, if you are sure you don’t perform the re-run migration then click on the Mark Teams Complete option.
Step-8: Next, move on to the Groups Tab, and specify the users through Fetch Groups or Import Groups.
Step-9: Finally, enter the destinations, verify the permissions, and click on Start Migration & it will accomplish your Microsoft Teams migration project plan.

At The End
To begin with, Teams to Teams migration is quite a unique and complex process. At the same time, ensuring your data is transferred to the destination safely is equally important. Hence, follow the above-mentioned Microsoft Teams migration checklist & project plan. And let the tool execute the task for you.