Installation of Microsoft Office Picture Manager in Office 365/2016


MS Office picture application enables users to manage, share, and alter (flip, resize, rotate, crop) images. It is rendered in the Microsoft Office 2010, 2007, and 2003 editions but, unfortunately missing in Office suite 2013, 2016, and Office 365. So, here we are with guidelines on how to install MS Office picture manager in Office 365 or 2016.
Just An Additional Information
Microsoft eliminated ‘Office Picture Manager’ software from latest Office suites because ‘Windows Photo Gallery’ program took its place. It is true that on 10th Jan 2017, ‘Windows Photo Gallery’ application was stopped in Windows Live Essentials. This happened because Windows 10 and 8.1 provided photo gallery, movie maker, like applications that provided somewhat same functionality as that of the Photo Gallery or Office Picture Manager. Thus, a guide on “How to Install MS Office Picture Manager in Office 365 or 2016” is provided for the users who still want to use it.
Process to Setup & Install Microsoft Office Picture Manager
In today’s era, still there are computer users who prefer using Office picture manager in their Windows OS. They feel comfortable to work with this program for image editing, organizing, and sharing. Therefore, following are the steps that describes Installation of Microsoft Office Picture Manager on Windows operating system in step by step manner:
Installation Hint – There is component named as Office Picture Manager, which is present in SharePoint Designer. This is a free designing application software that is utilized to customize and develop websites and programs in SharePoint.
- According to the MS Office bit edition (32-bit or 64-bit), download SharePoint Designer from Microsoft official site.
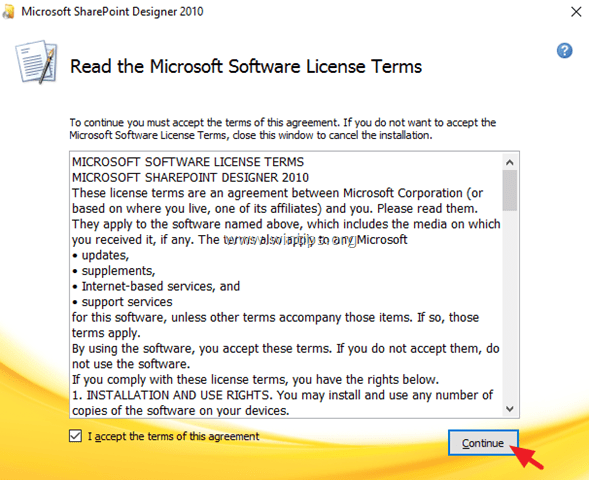
- Run the installer program when it completely gets download on your machine. Check the checkbox of ‘I accept terms…’ and click on Continue.

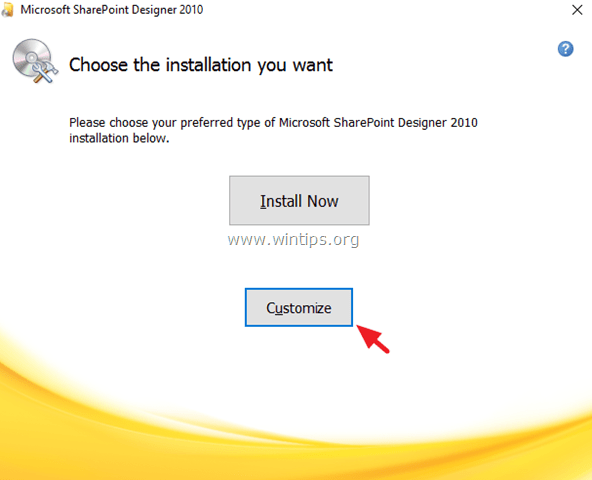
- Click on the Customize button in the ‘choose installation you want’ wizard
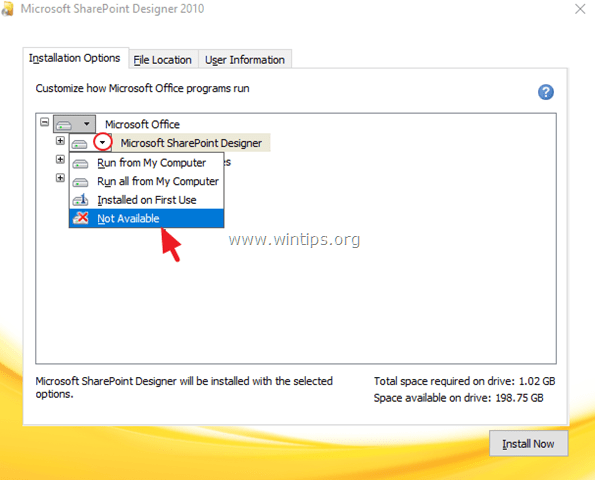
- Click on expand button of Microsoft Office and then on drop down button of Microsoft SharePoint Designer. A list appears from which you have to select Not Available option
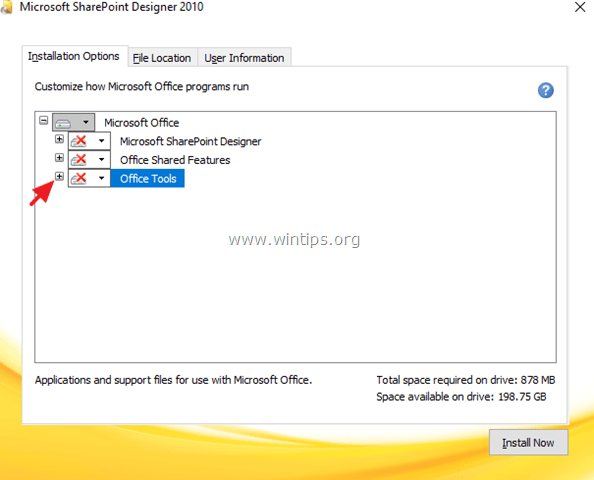
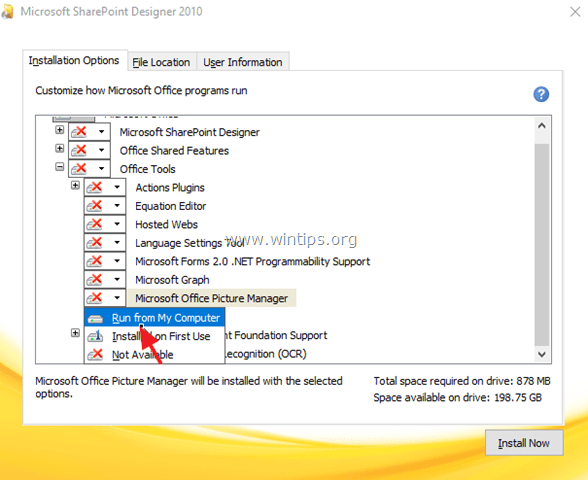
- Go to Office Tools and click on its + sign for its expansion
- Click on drop-down icon of Microsoft Office Picture Manager and choose Run from My Computer option
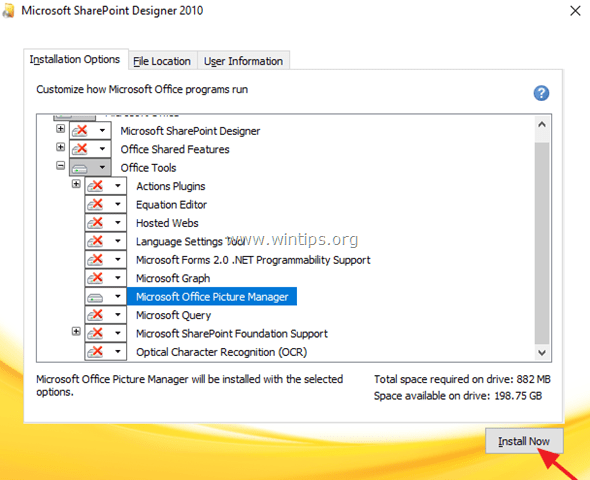
- After doing all the above mentioned settings, check all of them for once and click Install Now to install Microsoft Office Picture Manager.
- After a while setup of Microsoft Office Picture manager in Office 365/2016 is done.
Conclusion
Microsoft Office 365 / 2016 users can refer this post to learn that how to install Microsoft Office Picture Manager within recent versions of Microsoft. It is easy and simple to configure Office picture manager application on PC. No need of any Microsoft executive or technician is required, if you implement each and every step of installation.