Tech Guidance to Import PST to Shared Mailbox in Office 365


Googling for the method to import PST to shared mailbox in Office 365?
Instead of getting manual approach, you are getting suggestions to use third-party software. Is this kind of scenario faced by you too? Don’t worry here comes a product-free approach for you!
Microsoft Office 365 is on top when it is about SaaS environment. It is used by several enterprises for managing different kind of operations online. Sometimes a situation occurs where Microsoft Outlook email users suffer from headache while working with PST file. The main problem arises when the data of .pst file is to be shared outside the business premises. Also, this file is not considered secured when it is observed from eDiscovery point of view. Therefore, here comes the role of O365 shared mailboxes! This post is going to give details about this kind of mailbox along with the solution to export PST from shared mailbox Office 365.
What’s Exactly is O365 Shared Mailbox?
Shared mailboxes in Microsoft Office 365 is a suitable option that enable business clients to share their duties of data monitoring. It also comprises of replying to messages from a single account, and all those replies can be seen by all, if its a shared mailbox. This approach is best suited when business officials are working in a team to respond to their customer’s queries. The Office 365 shared mailboxes are considered ideal to store mailbox information of terminated employees. In comparison to the PST file, Microsoft Shared mailbox is found secured even on cloud.
All these statements are the reasons due to which users desire to import PST to shared mailbox in Office 365. Keeping the client’s requirement in mind, Microsoft introduced a new tool named as PST collection tool. This utility enables end users to export PST file to shared mailbox in Office 365 via Import Service. Well, there are some prerequisites before using this app and they are mentioned below :
- Credentials of Exchange Online administrator account
- Assign the ‘Import Export Mailbox’ role to administrator
- Add a bonus to the procedure by availing higher bandwidth
Track Method to Import PST to Shared Mailbox in Office 365
The procedure to move PST file in shared mailbox of Office 365 is known as ‘Network Upload Workflow’. This workflow comprises of following six major steps to be carried away :
- Step 1 : Download PST import tool & key to private Azure storage location
- Step 2 : Upload the source PST file to Azure storage location
- Step 3 : Generate a PST mapping file
- Step 4 : Start With an initial PST Import Operation
- Step 5 : Filter out the PST data to be imported
- Step 6 : Begin with the importing process
We know that it might be not possible for you to implement 6 steps on your own. Therefore, here we came with description of these steps to guide you in importing PST to shared mailbox Office 365.
Step 1 : Download PST Import Tool And Key To Private Azure Storage Location
(a) Login into your Office 365 tenant and click on Security & Compliance app
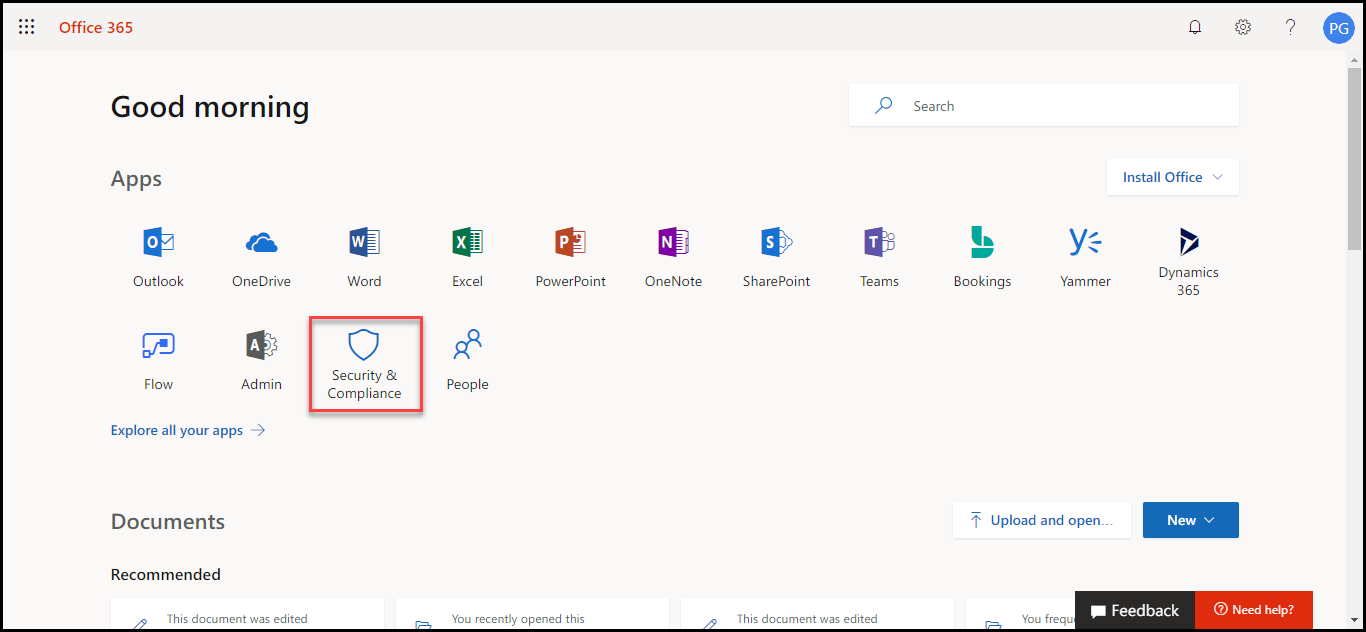
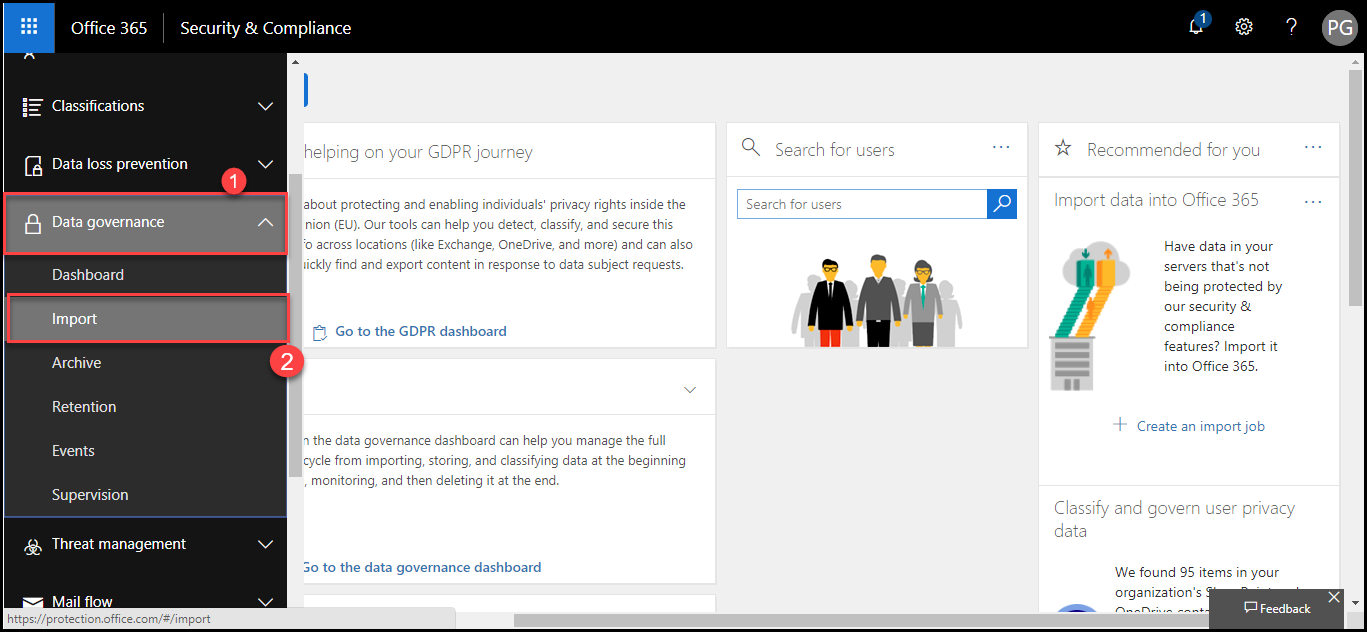
(b) Explore the left hand side menu and then, expand the Data Governance option. A list appears in which you have to click on Import
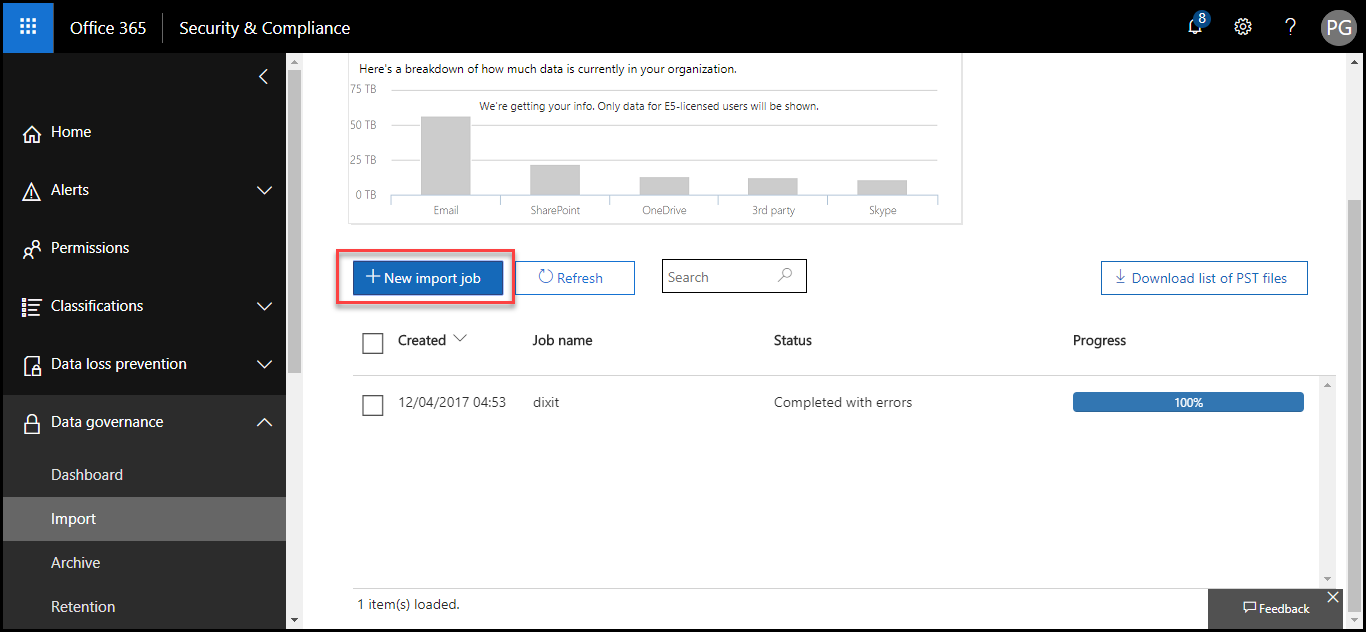
(c) Now click on the New Import Job button to open its respective wizard
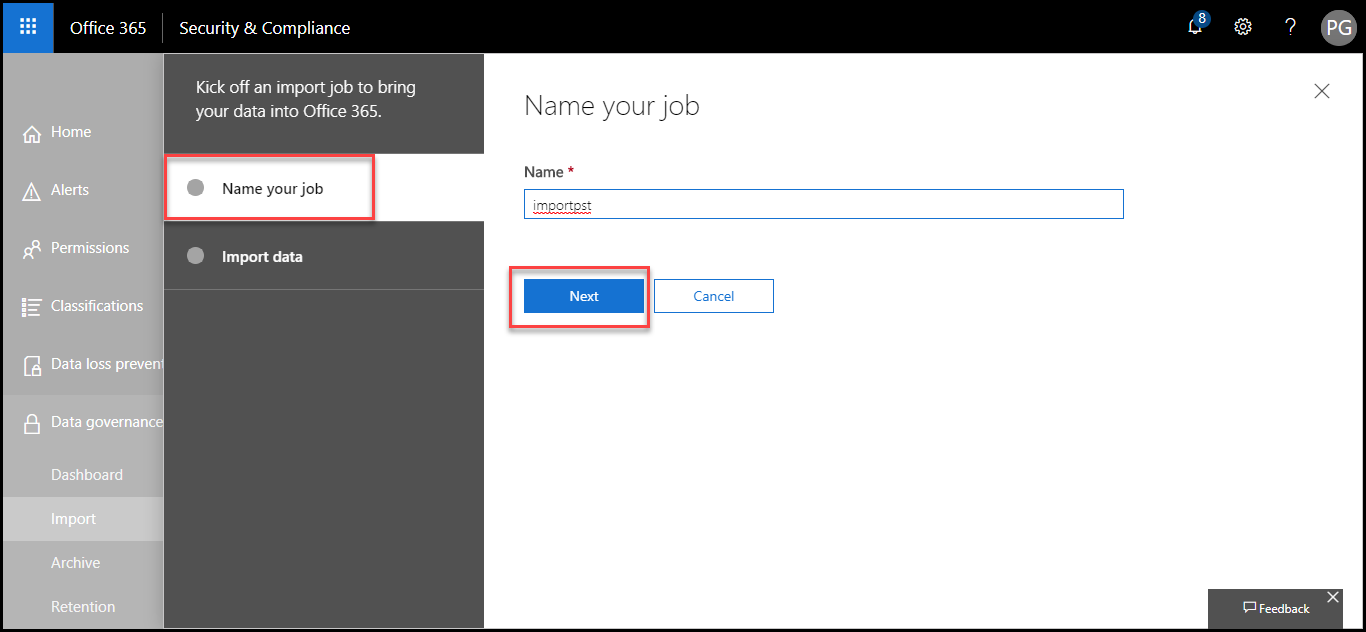
(d) Just after clicking on the ‘New Import Job’ button, a new side page gets opened. This side page will ask you to enter the name of job. Mention any of your desired name in the respective text box and click on Next to Import PST to Shared Mailbox in Office 365.
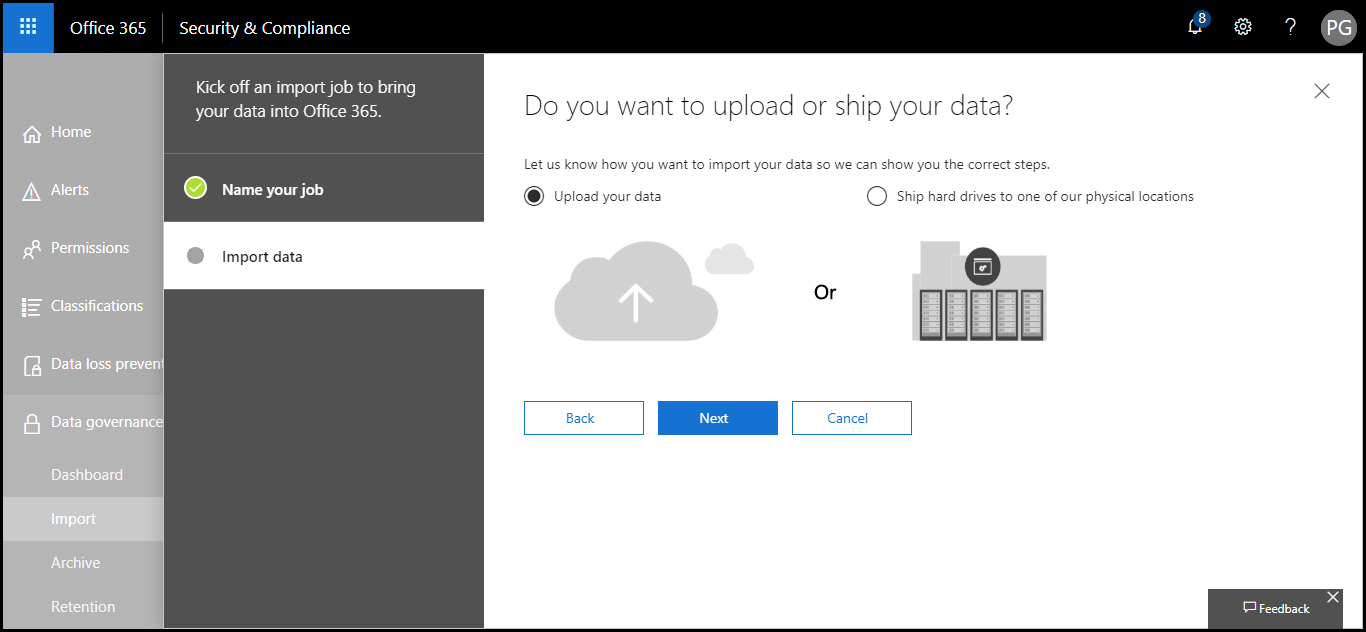
(e) On the current screen a question will be asked by you – Whether you want to upload or ship your data? Since we are importing PST to shared mailbox Office 365 therefore, enable the radio button of Upload your data and then, hit Next to export PST from shared mailbox Office 365
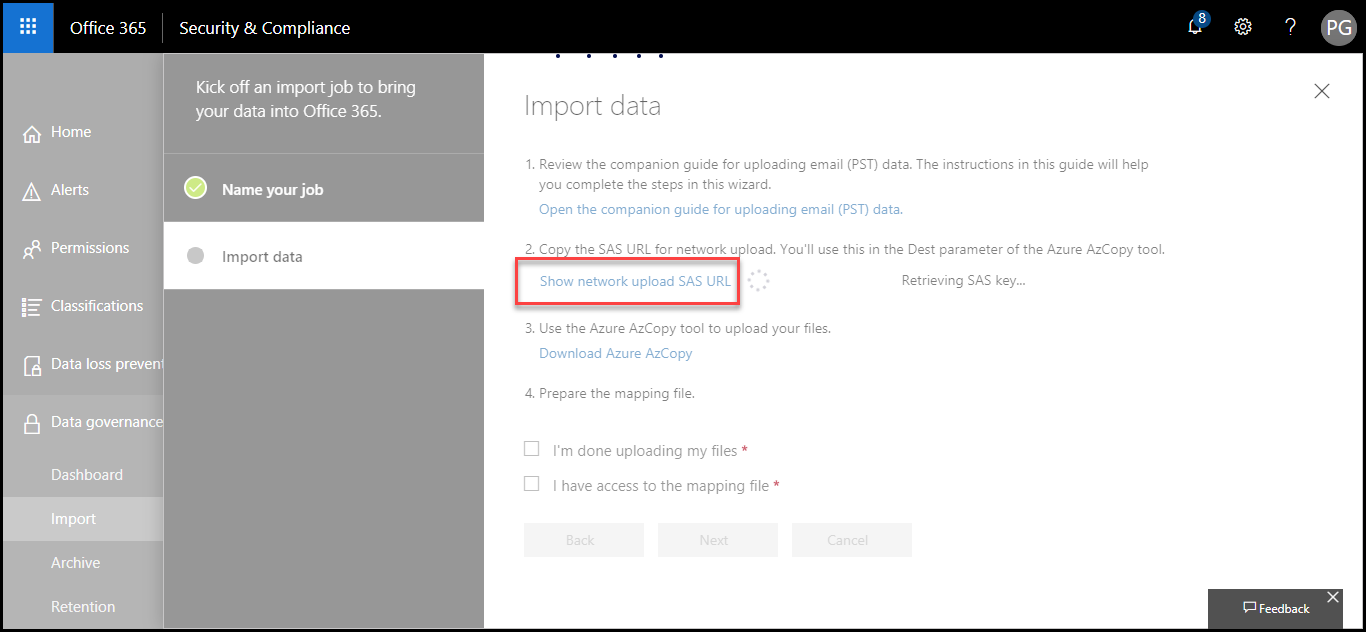
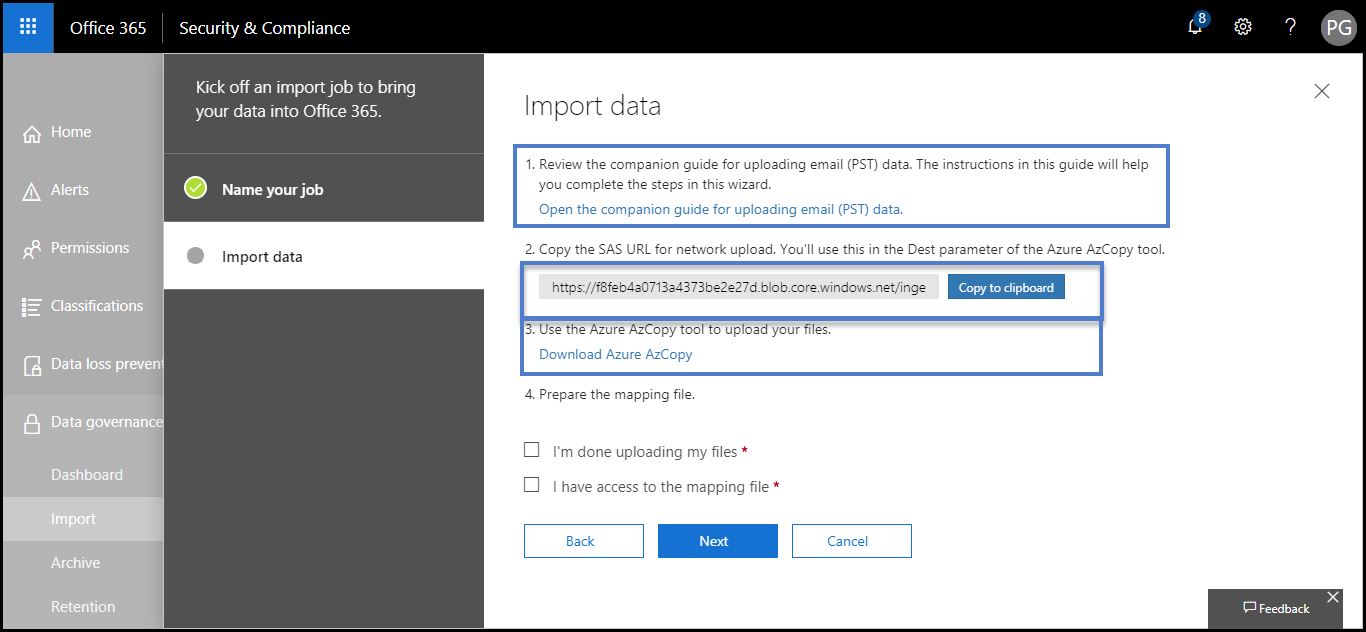
(f) This opens the page of ‘Import data’ from where you have to copy SAS URL to attempt network upload. Click on the link of Show network upload SAS URL to command Microsoft Office 365 to retrieve the key
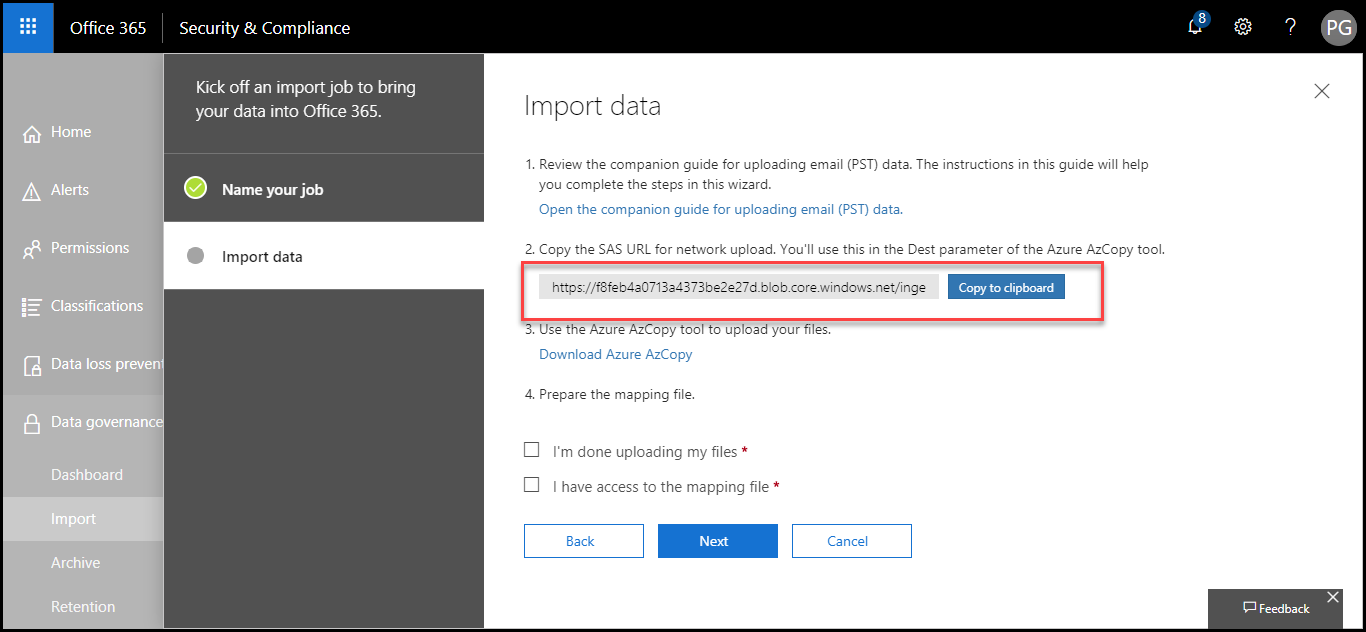
(g) Wait for a while and then, you’ll find a key displayed in the text box. Click on the Copy clipboard button to copy the URL
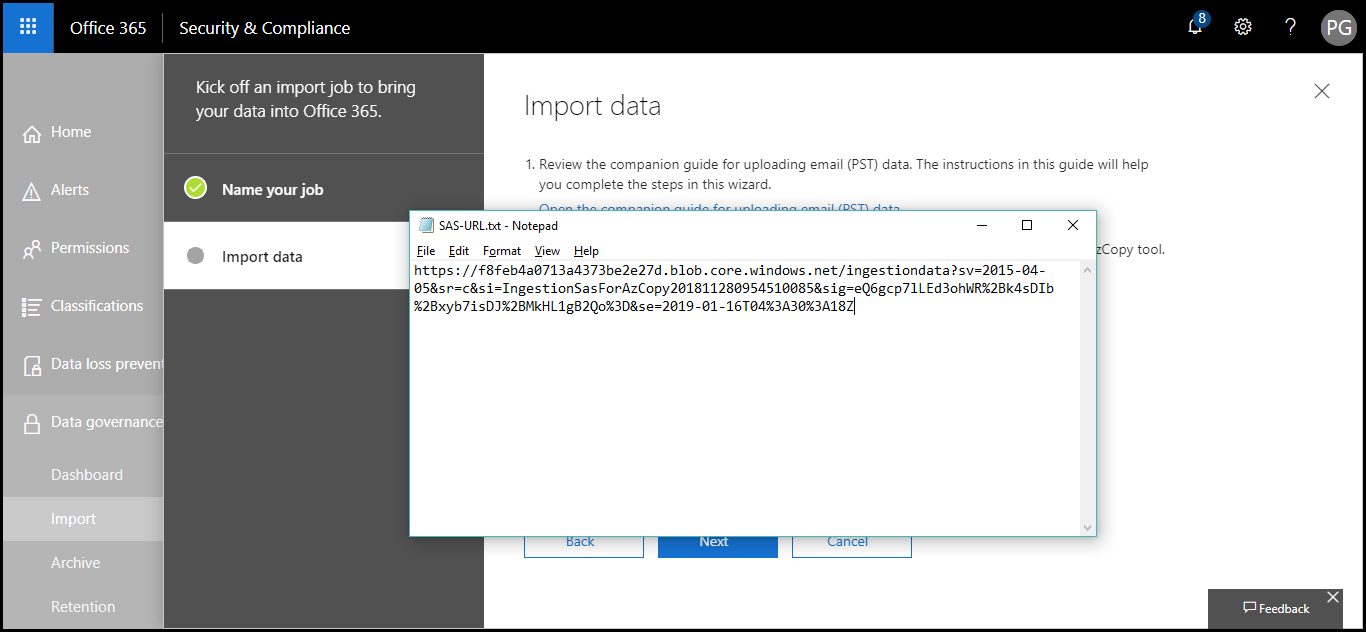
(h) When you are done with copying of URL, open the notepad file on your window and paste the copied URL to Import PST to Shared Mailbox in Office 365
Step 2 : Upload The Source PST File To Azure Storage Location
(a) Download and install Microsoft Azure Storage utility from its official website to proceed with importing PST to shared mailbox Office 365
(b) Once done with the installation process, open Microsoft Azure Storage Explorer app on your PC
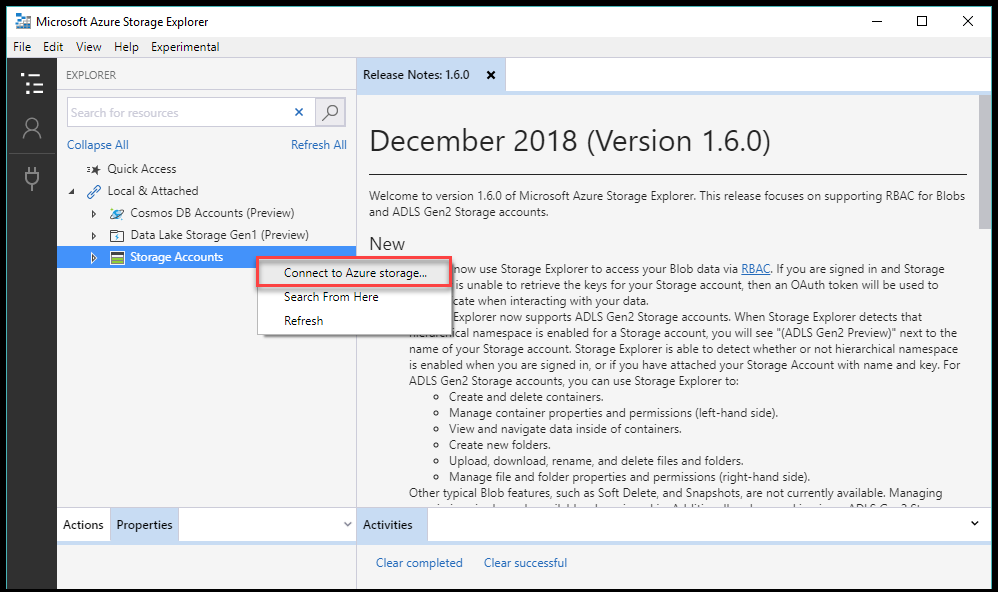
(c) When the app successfully gets launched, right-click on the Storage Accounts from left-hand side of the menu. A list appears from which you have to select Connect to Azure storage option
(d) Start with establishment of the connection by enabling the radio button of Use a shared access signature URI. Click on Next to continue with the process to Import PST to Shared Mailbox in Office 365
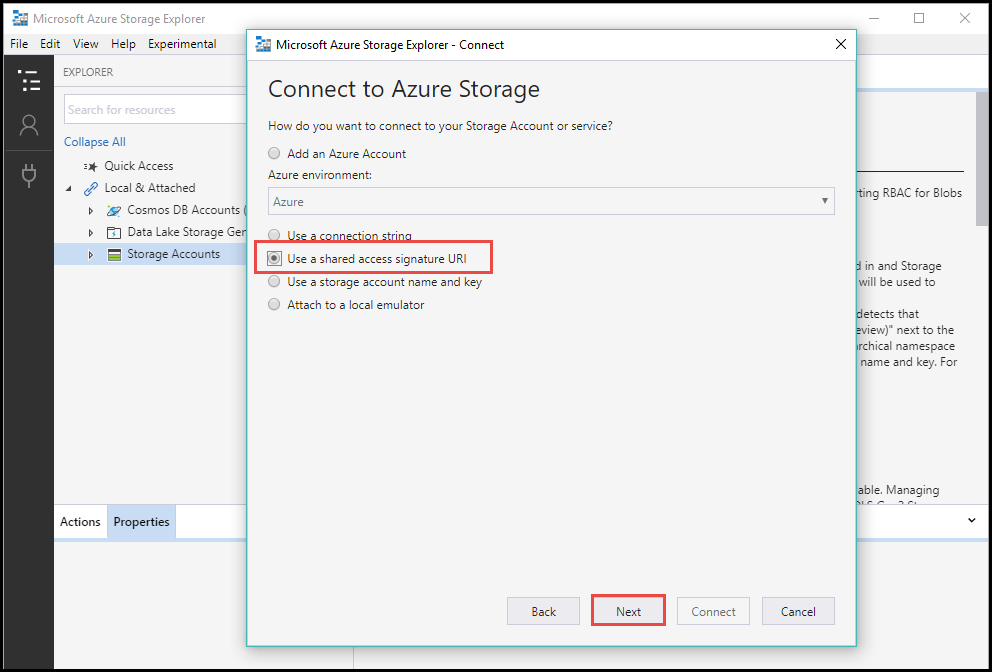
(e) Now, the URL which you have copied in Step (1), paste that in URI section and click on Next to export PST from shared mailbox Office 365
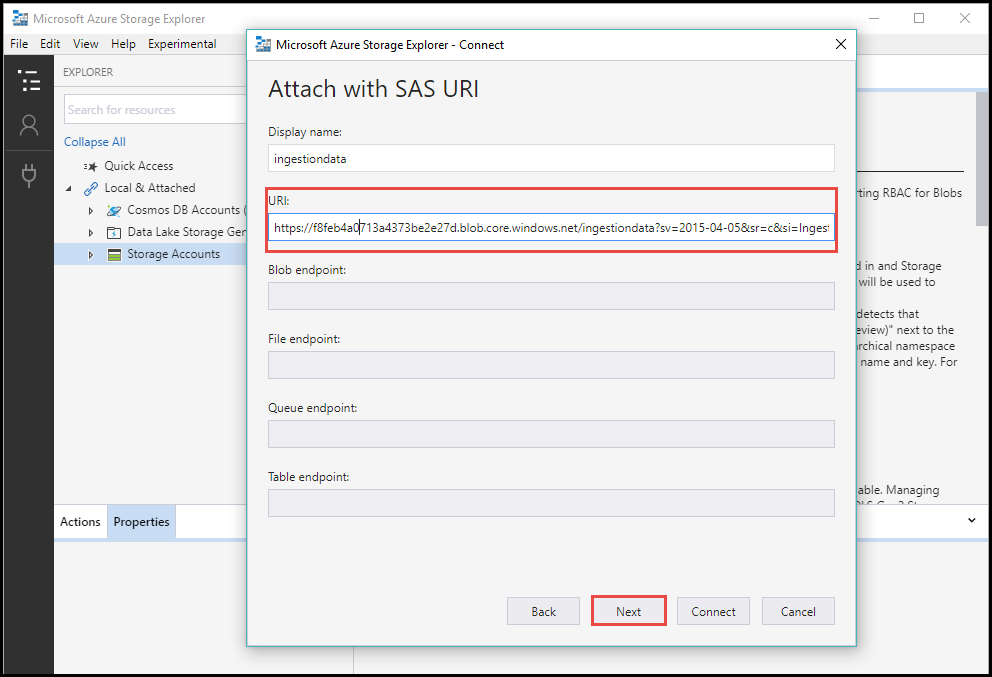
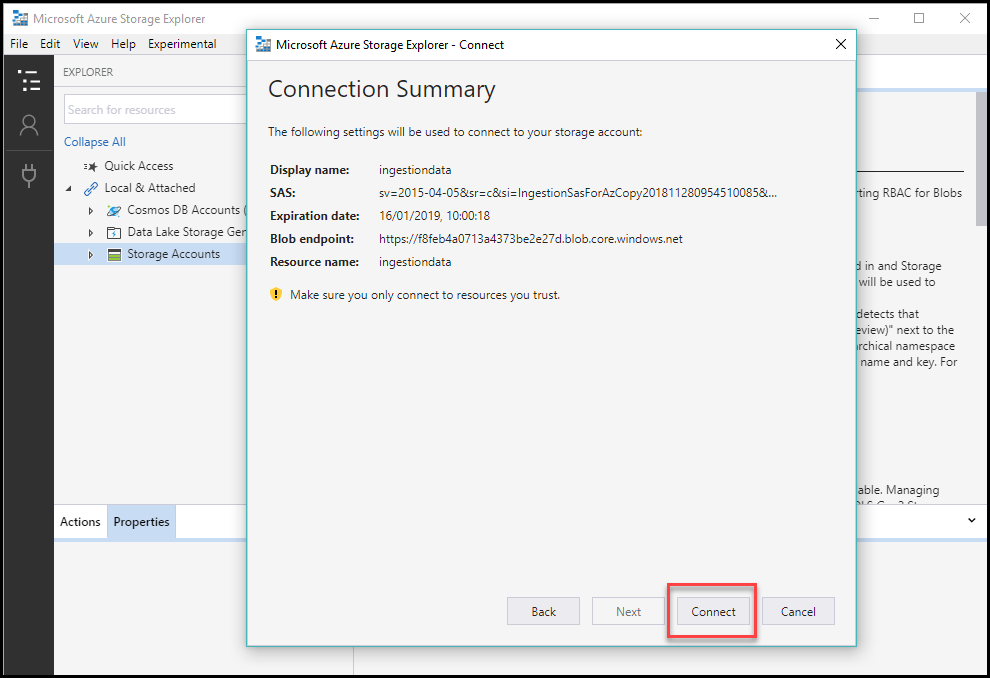
(f) A connection summary wizard appears in which you have to check all the settings made by you. Ensure that you are establishing connection with trusted resources. If you desire to make any changes, click on Back; else, click on Connect
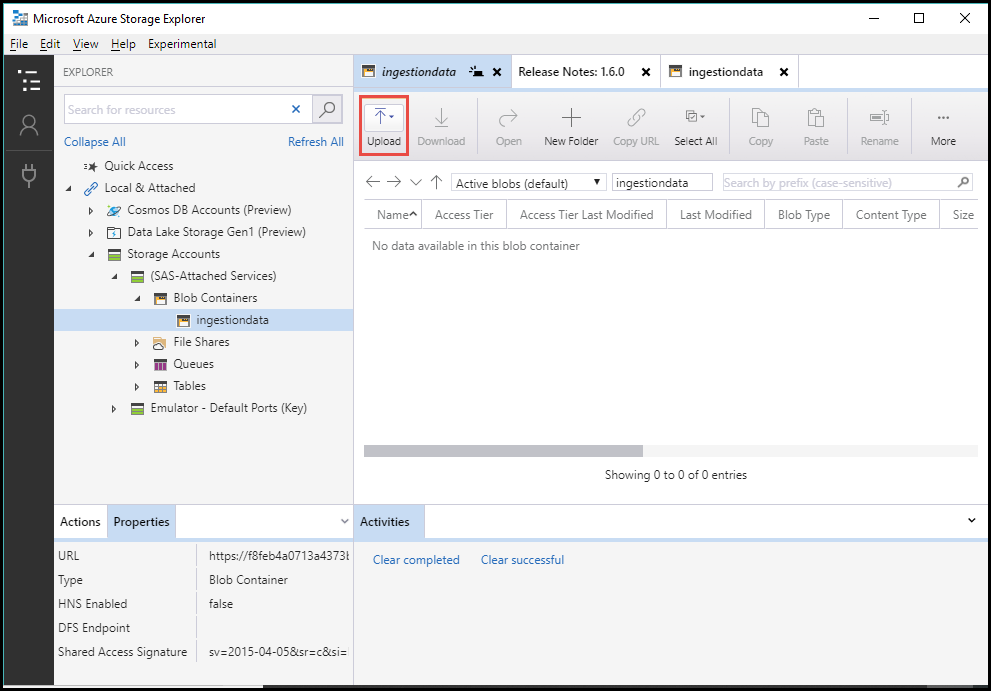
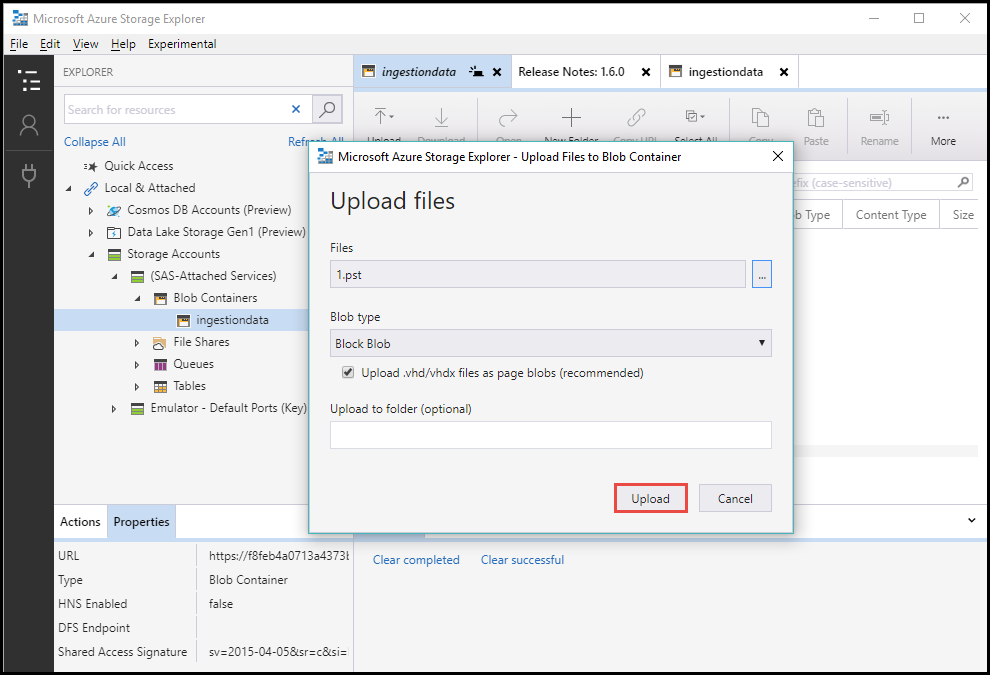
(g) Till this stage, you have established the connection of Azure Storage app with pasted SAS URL. Now click the drag button of Upload and choose Upload Files option
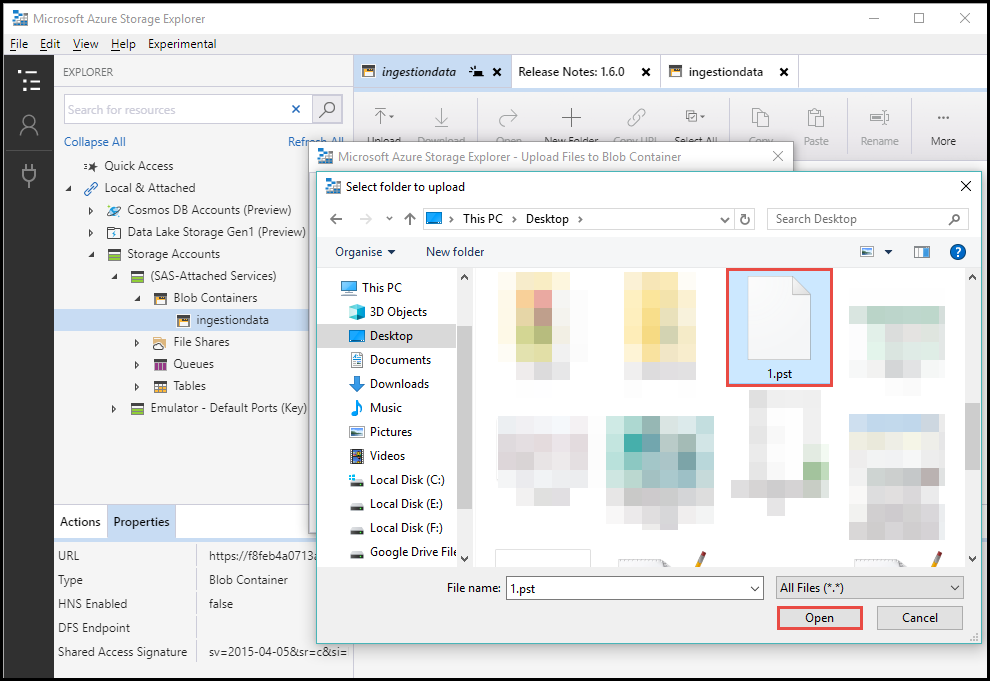
(h) This opens an Upload files wizard where you have to choose the PST file that is to be imported in Office 365 shared mailbox. Click on three dots icon to browse the file. Select the file from PC’s location and click on Open button
(i) Simply click on Upload button and till the time PST file gets uploaded, meanwhile you can perform Step (3) of network upload process to export PST from shared mailbox Office 365
Step 3 : Generate a PST Mapping File
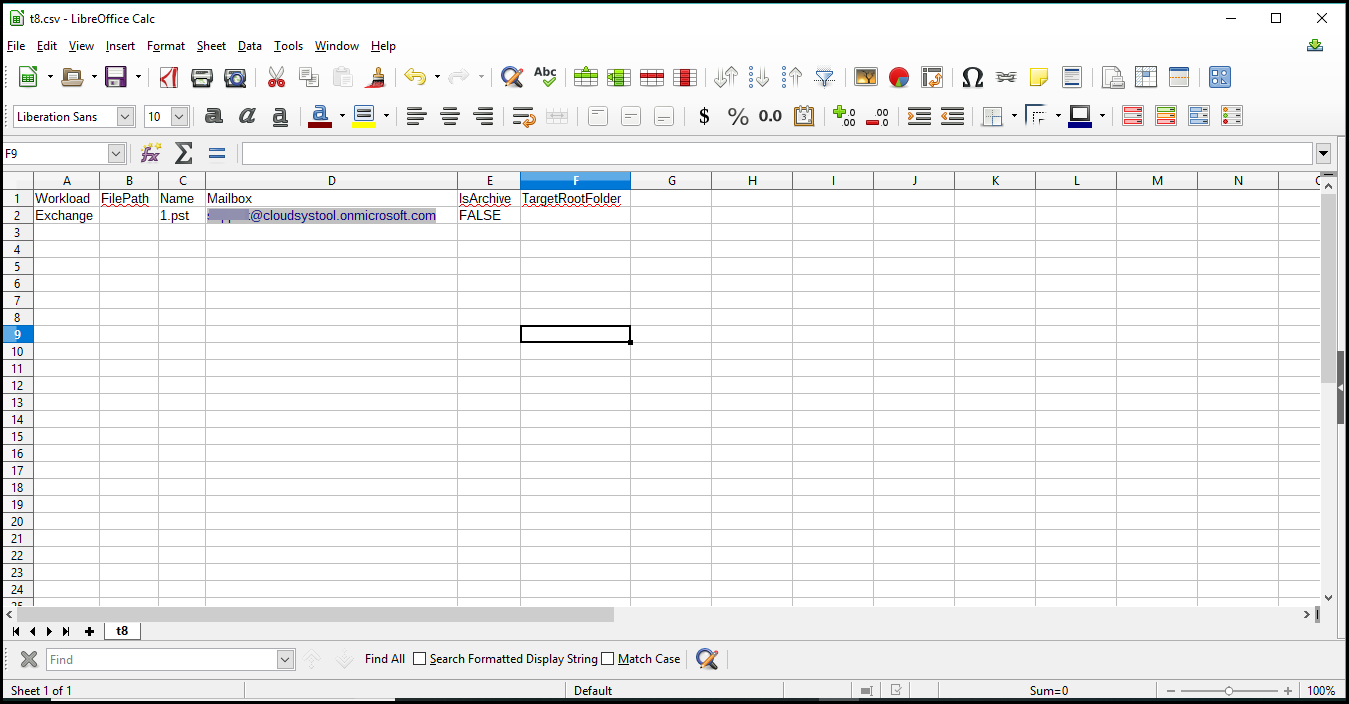
Now redirect back towards the Office 365 import page. Observe that you are done with requirement of Point (1), (2), and (3). Now its time to prepare the mapping file to continue the steps to import PST to shared mailbox in Office 365.
Minimize the current web browser and open Excel Program on your system, and make sure that it is having only 4 parameters – Workload, FilePath, Name, Mailbox, IsArchive, and TargetRootFolder

Workload – The ‘Exchange’ value needs to be mentioned in this column. It defines the default value of the scenario where we move .pst file to Office 365 tenant. In simple words, mention this particular value for each row.
Name – Simply you have mention the name of source PST file, which is to be imported in shared mailbox of Office 365
Mailbox – Enter the name of shared Office 365 mailbox in which PST file is to be migrated.
TargetRootFolder – This is the folder name, which will be initiated at the destination mailbox of Exchange Online tenant that comprises of imported PST file
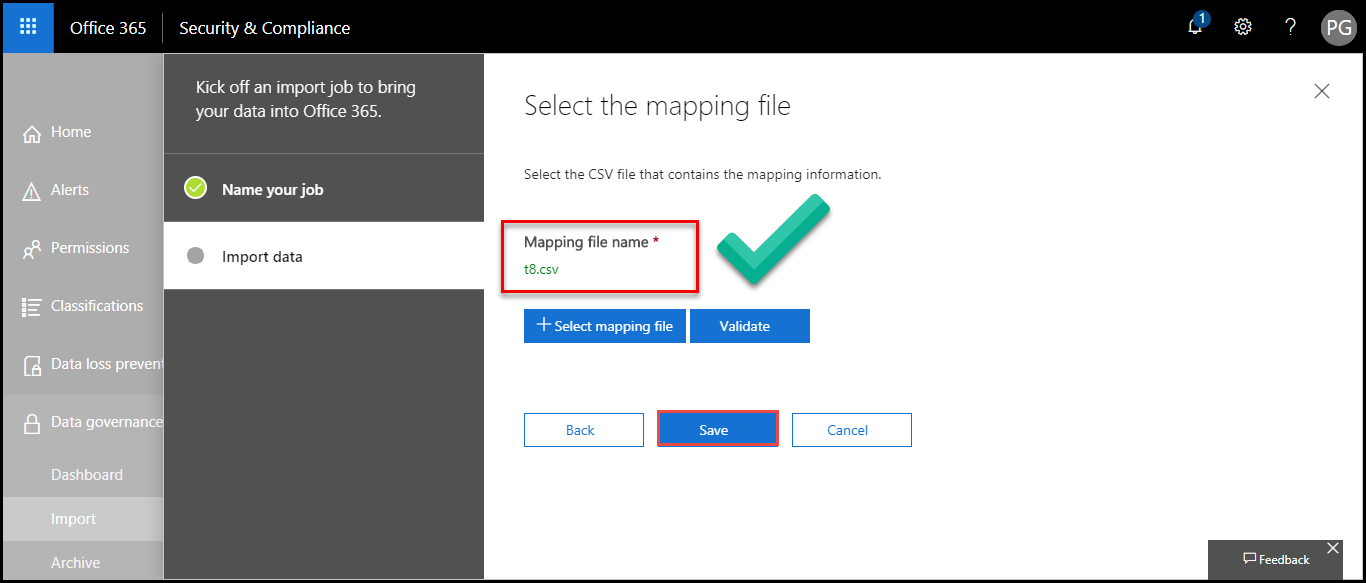
You can take reference from following screenshot to create your CSV file.
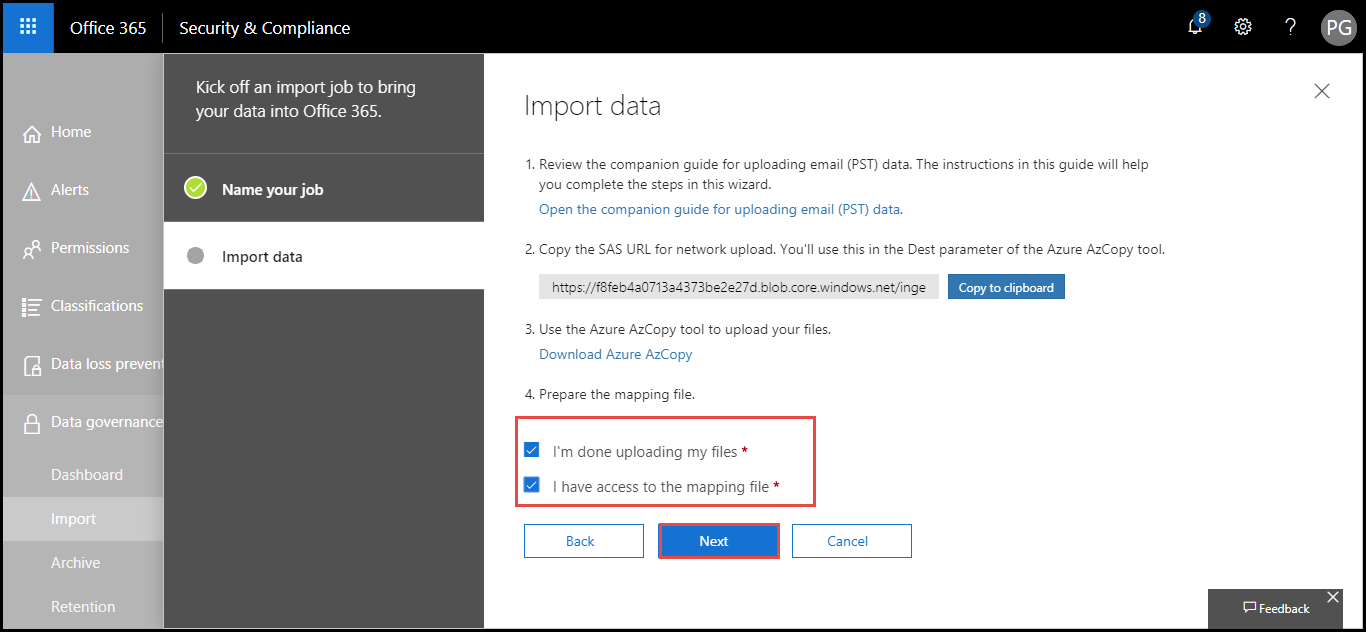
Go back to the minimized web browser and open Import Data page. Now, enable the both the checkboxes present under the section of Preparing the mapping file. After this, click on Next button to continue with importing PST to shared mailbox Office 365
The next process to import PST to Office 365 shared mailbox demands for uploading of CSV file, which you have recently created. For this, click on Select Mapping File button browse the respective CSV file from the location where you had saved CSV. Once the file successfully gets uploaded, click on Validate button for validation purpose. Click on Save >> Close >> Close button
Step 4 : Start With an Initial PST Import Operation
Finally, we are quite closer to the ending of process to import PST to shared mailbox Office 365. We are started with PST file importing state. On the recent web page, you will be able to see current status of the PST file being getting imported
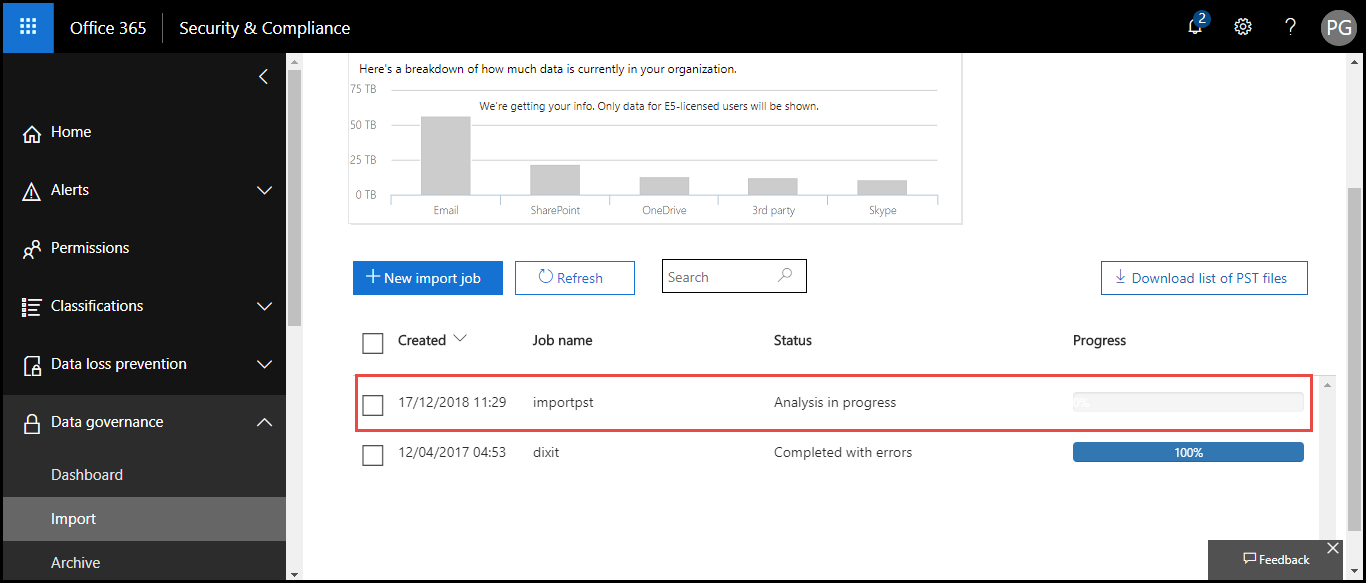
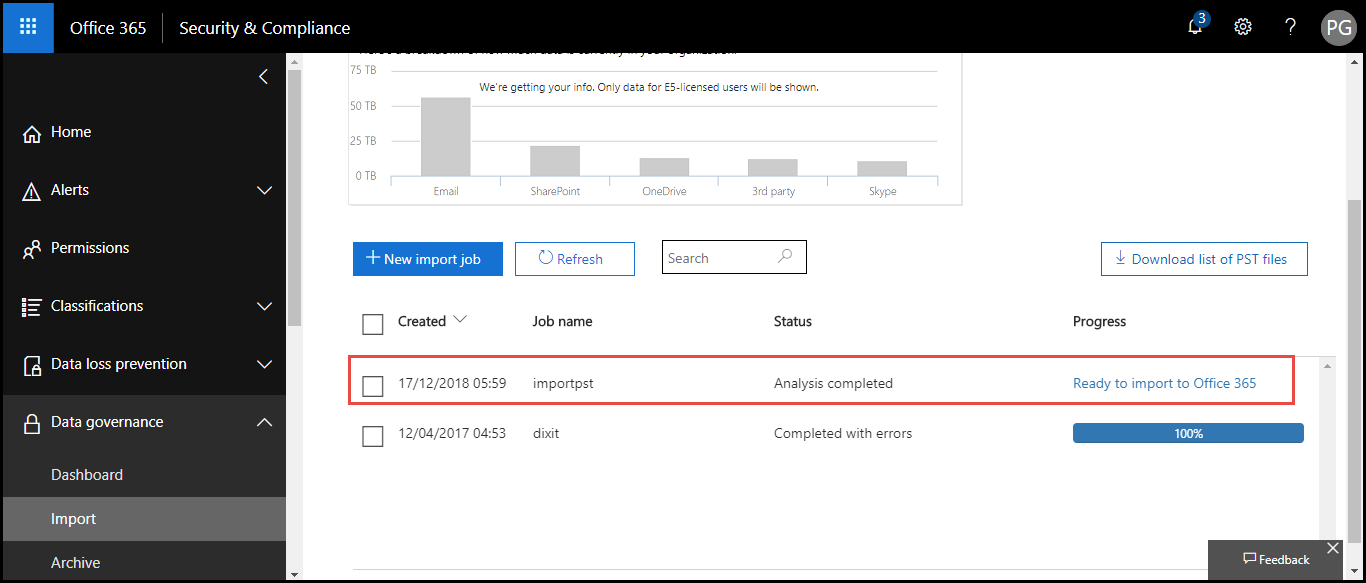
Now you have to patiently wait until and unless the progress state isn’t ready to import. Make sure that the internet connection is proper. Once the process gets completed, a ‘Ready to import to Office 365’ hyperlink appears
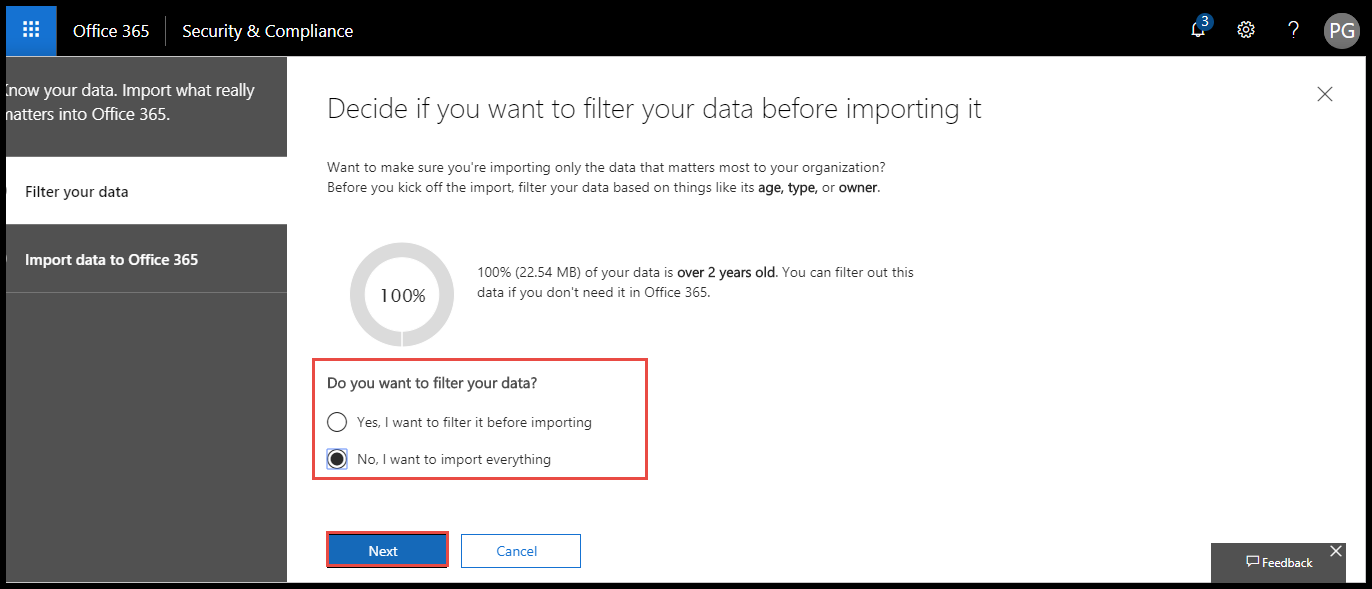
Step 5 : Filter Out The PST Data To Be Imported
(a) Click on the hyperlink that appeared in the Step (4). Now click on Import to Office 365 button.
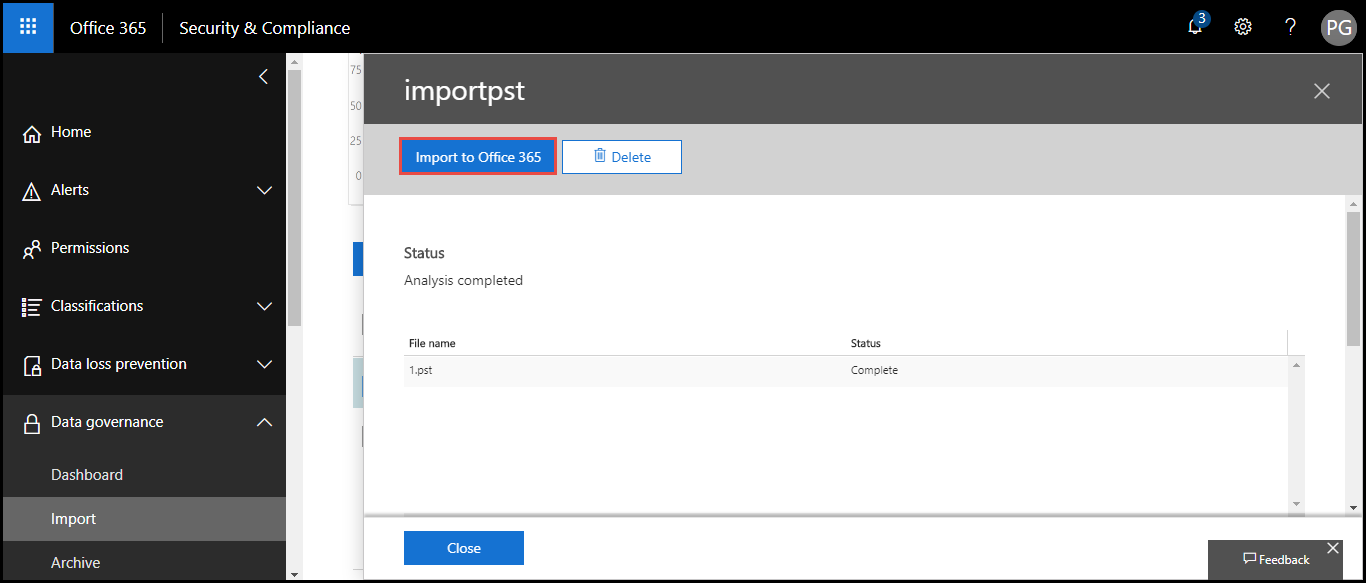
(b) A Filter your data field appears in which you have to decide whether you want to filter out any data before importing procedure or not
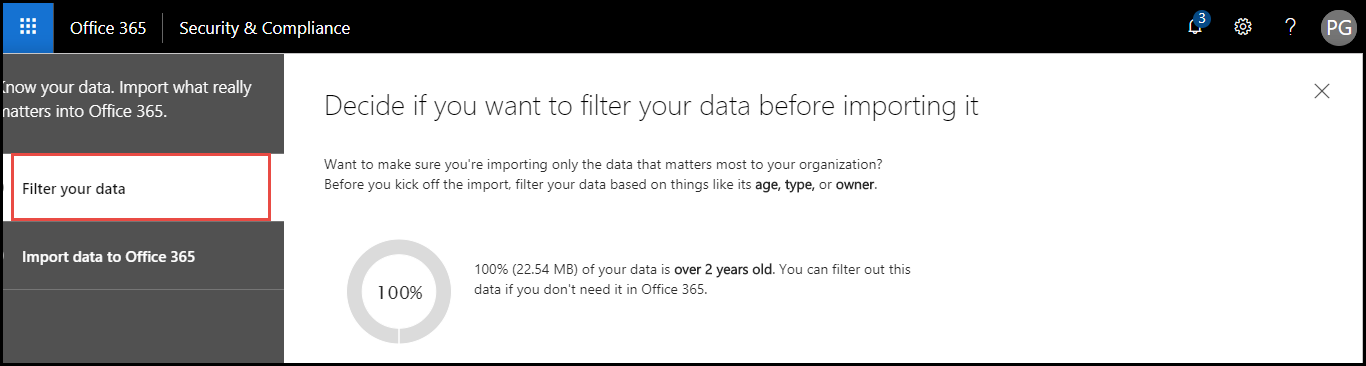
(c) If you desire to filter out the data, click on Yes; else simply click on No radio button. Continue with the procedure to import PST to shared mailbox Office 365 by clicking on Next button
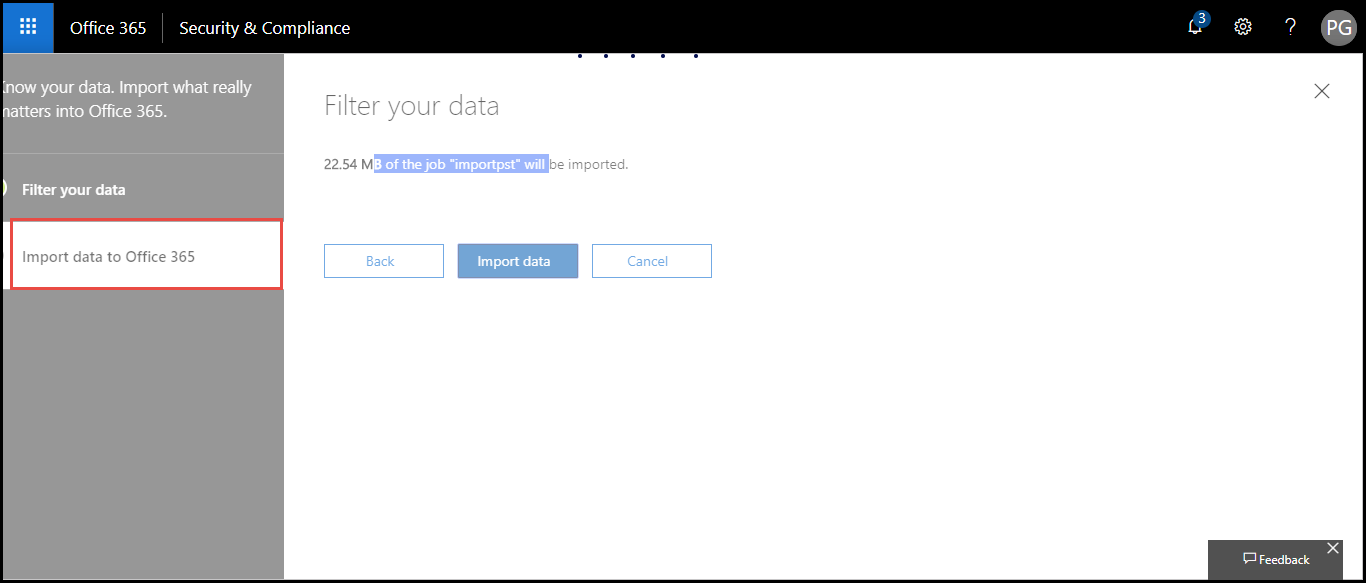
Step 6 : Begin With The Importing Process
a) Next opens Import data to Office 365 field where you have to once read the message posted on current page and then, click on Import Data button, if all is okay
b) Now a Status page appears, which gives each and every report of exporting procedure to import PST to Shared Mailbox in Office 365.
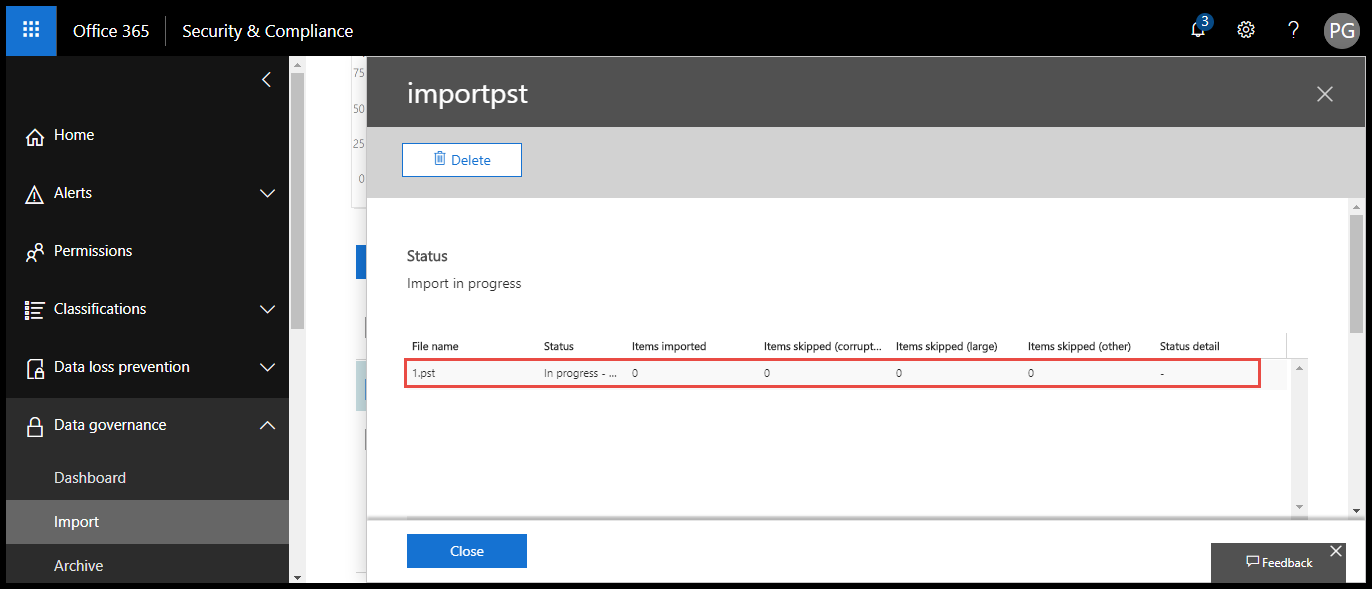
c) When the process gets completed, a message will appear. You can then see the data of PST file in shared mailbox of Office 365
Time to Conclude
The free and foolproof method to import PST to shared mailbox in Office 365 is mentioned in this post. Experts themselves have implemented the process and given you solution along with screenshots. Users can rely on these expertise skills to accomplish their task. If you are facing any problem while implementing the approach, feel free to contact with Invorx support team. Our consultants will serve you in the shortest time period with a suitable answer to your question.
Still, if you prefer to use the third-party tool then use the one mentioned below. It is a fast and reliable tool than any other application over the internet
Related Post: Know how to migrate PST to Office 365?
Frequently Asked Question & Answers
A: Yes, using third-party software like Office 365 import tool, you can easily import multiple PST files.
5 simple steps to import PST file to Office 365 shared mailbox are:
Step 1: Download & Install Office 365 Import tool
Step 2: Enter Office 365 user or Admin Credentials
Step 3: Import PST file by using Add File / Folder button
Step 4: Select Category & Apply filter option
Step 5: Click on Import button to begin the process
A: No, Network upload doesn’t provide an option for incremental migration. You can try the Office365 Import tool for this purpose
A: The time required by both methods are totally depended upon the size of PST file to be imported and Internet Speed.
A: No, there is no option to filter out the PST file data while importing PST file to Shared Mailbox Office 365