Learn Stepwise Procedures on How to Set Auto Forward in Office 365

Business users make use of automatic forwarding to transfer the received messages to another account via the automatic procedure. Auto-forwarding feature hides the original identity of the email sender, and only displays the email address of the person who had forwarded the mail. When the recipient of forwarded mail will give a reply to it, it will go to the sender who had forwarded the message. Several email clients are provided this service in their application and one such is Microsoft O365. In this post, we are going to illustrate procedures to set auto-forward in Office 365.
Workarounds to Setup Auto Forward in Office 365
Try the following mentioned methods to set Auto forward in Outlook Office 365.
# 1: Make Changes in the Account Settings
Refer following steps to set auto-forward in Office 365:
- Login into your Microsoft Office 365 account and click on Outlook button, which is under the apps section.
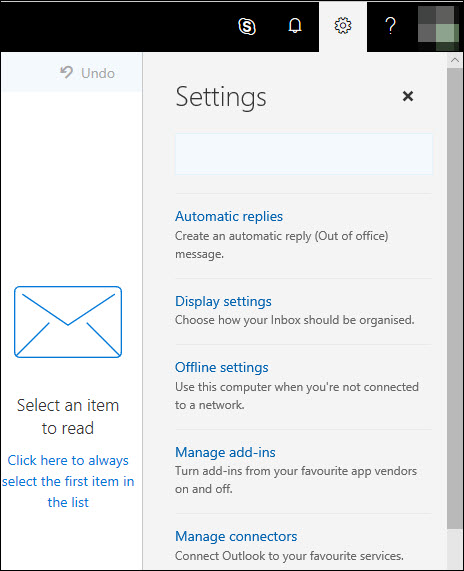
- This opens a new tab, which displays Outlook on the web application. Click on Settings icon, located on the right-hand side of the screen.
- In the search box of settings, type Accounts and click on the option
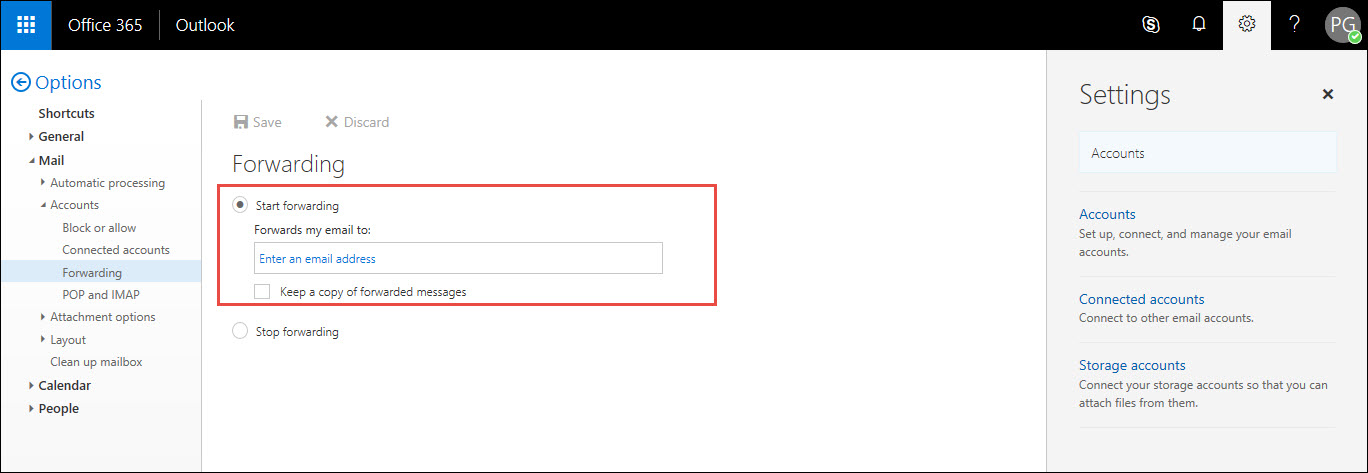
- See on the left-hand side of your screen, where you will find Forwarding option listed under the Accounts section.
- Click on Forwarding option and activate radio button of Start Forwarding. Enter the email address in which you want to set auto-forward in Outlook Office 365.
- (Optional) Enable the checkbox of ‘Keep a copy….’ if you want to store the copy of a forwarded message in your mailbox.
Note – Check the mailbox size, if you are keeping the copy of a forwarded email. Automatic forwarding option will not work in case the size limit exceeds.
- At last, click on Save button to use auto-forwarding in Microsoft Office 365
# 2: Use Message Rules to Set Auto Forward in Office 365
When you are unable to activate automatic forwarding in O365, you can go for this alternative method. In this, you are going to use automatic forward feature through message rules:
- Open the Settings window of Outlook on the web.
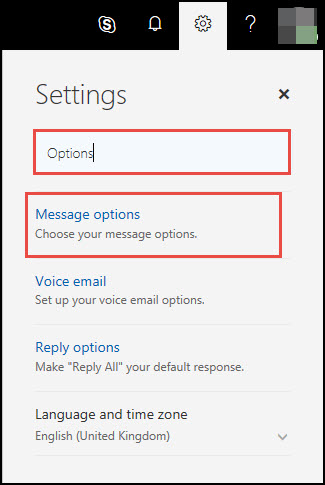
- In the search bar, type Options and click on Message Options.
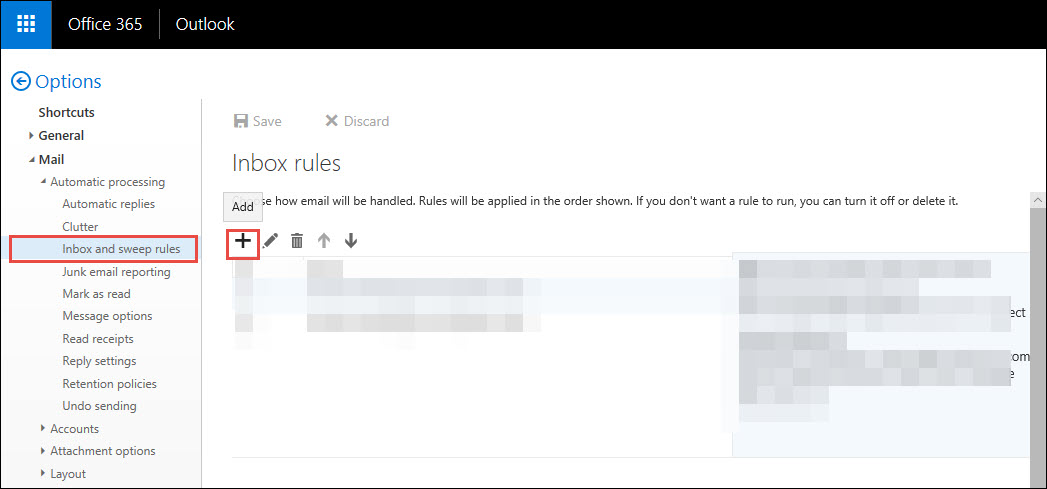
- Click on Inbox and Sweep rules option and then on Add icon.
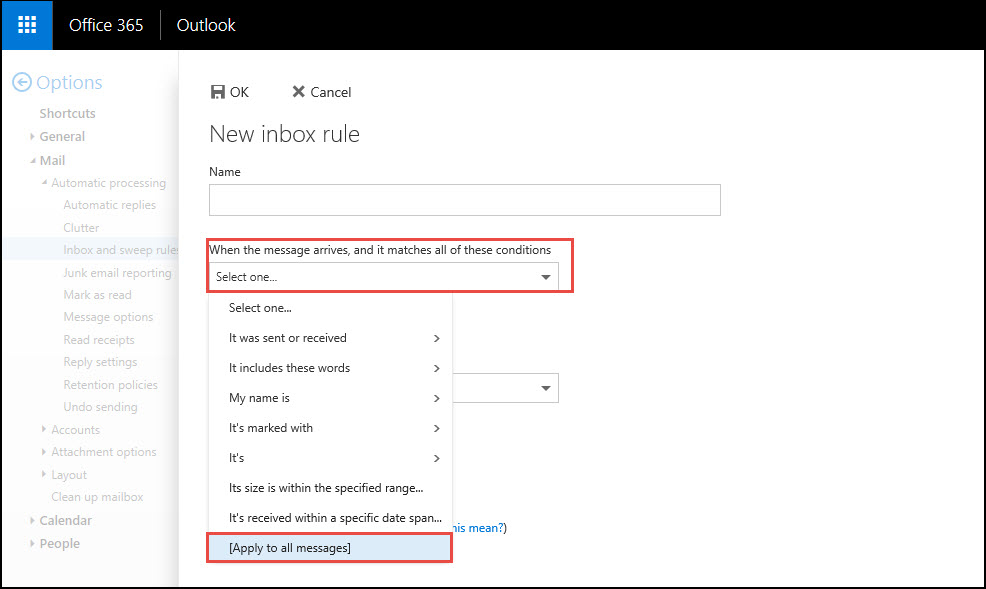
- A New inbox rule window gets opened in which you have to mention the name of the rule. In another section, choose to Apply to all messages from the list of ‘When the message arrives’.
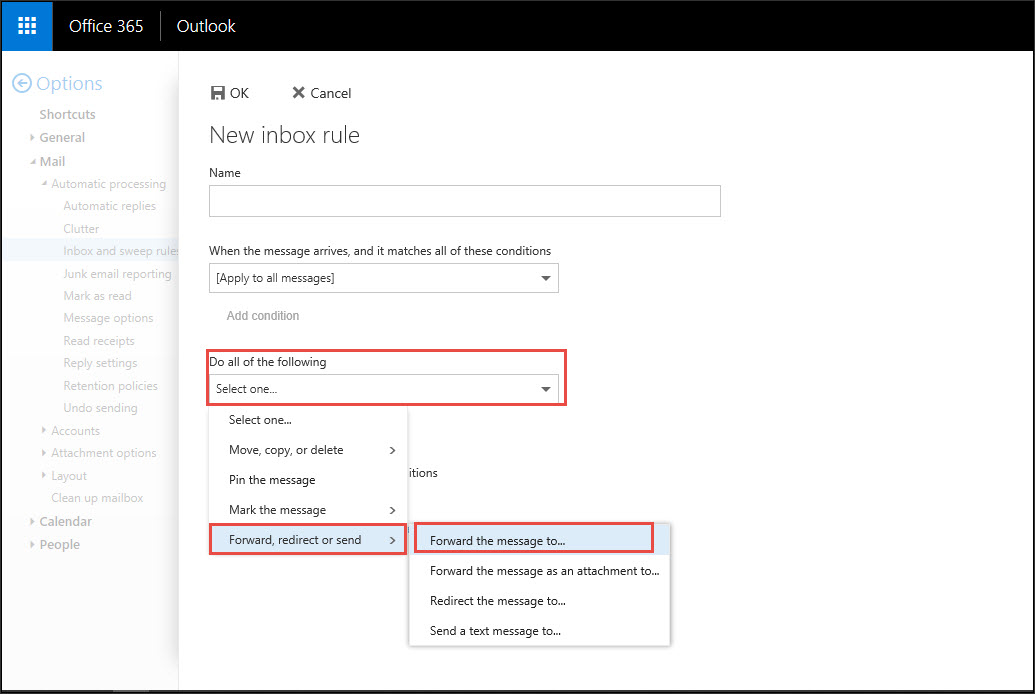
- Next comes the Do all of the following fields in which you need to select Forward, redirect or send >> Forward the message to.
- In the section of forwarding the message to, enter the email address where messages are to be forwarded. Click on Save button to proceed with the process to set up auto-forward in Office 365.
- Finally, you will find your created rule listed in the Inbox rule
Conclusion
The post describes the foolproof solution to set auto-forward in Office 365. Enterprises can make use of this feature for their one or another purpose. Only the email address on which the emails are to be forwarded needs to be known. Rest, you can implement to set auto-forward in Outlook Office 365 to the single user at a time by referring to this blog.


