How to Import PST File to Exchange 2016 Mailbox – Stepwise Guide

It is often necessary for the users to import Outlook data files to Live Exchange 2016. This import can be done in multiple ways but not all of them are easy to perform. Here, we will learn how to import PST file to Exchange 2016 mailbox using SysTools Exchange Import Tool. Follow the subsequent instructions to perform the import process.
- Move Outlook PST to Public folder to Exchange Server mailbox
- Transfer all PST Data such as Mails, Calendars, Contacts, Tasks, Journals, and Notes
- Capability to move PST File Stored within Domain Network.
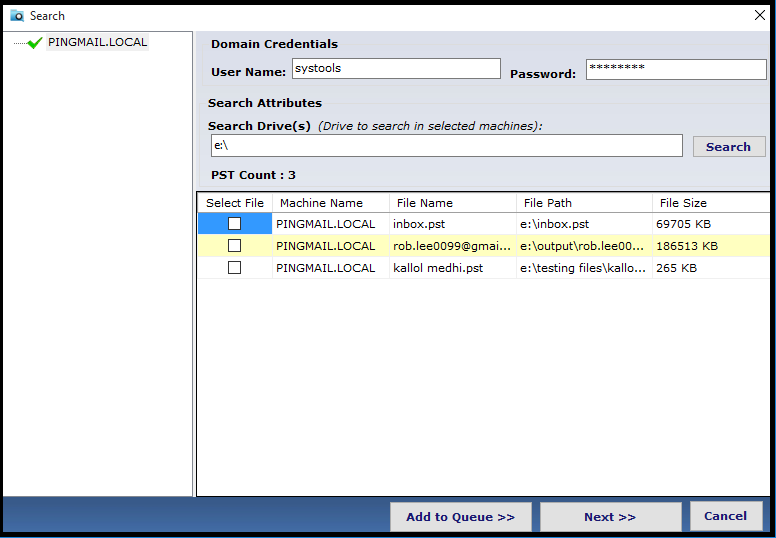
- Sub-Domain Search Option also included in Exchange import
- Administrative Permissions Needed while performing the Migration Process
- Exchange Import Tool Supports Latest Exchange 2016, 2013, 2010 Server Versions.
How to Import PST file to Exchange 2016 Mailbox – Stepwise Guide
As Exchange Import Software supports the import process of PST File for all versions of Exchange Environment from 2016 and all below versions. As the process divide into different stages, Exchange Administrative need to follow to import the PST File into Exchange Environment
Working Steps For How to Import PST File to Exchange 2016 Mailbox
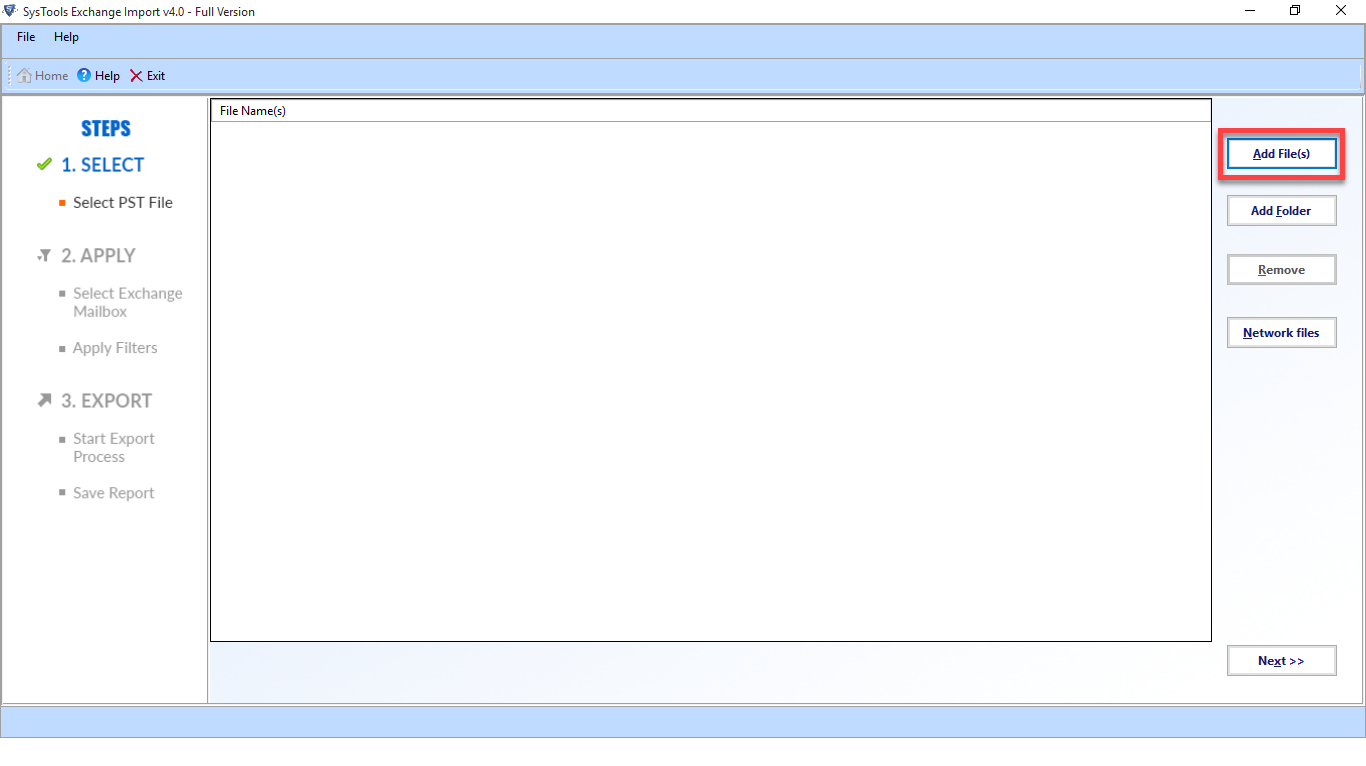
1. To begin with, launch the application on the system you wish to conduct the import. Software UI will look like the below image where users will see three options to include PST files to this tool. Click Add File button to add the PST file you want to import.
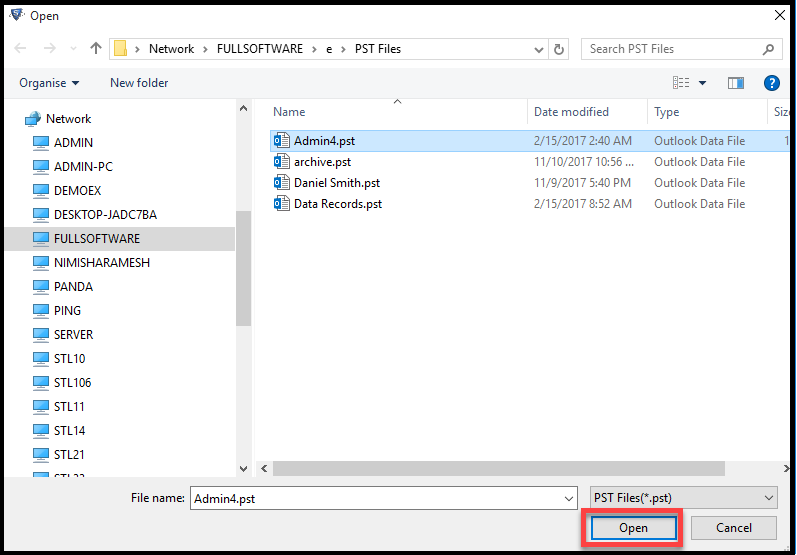
2. Users will be taken to a location of the local system where PST files are saved. Users can also navigate to any other location. Select the PST files and click Open.
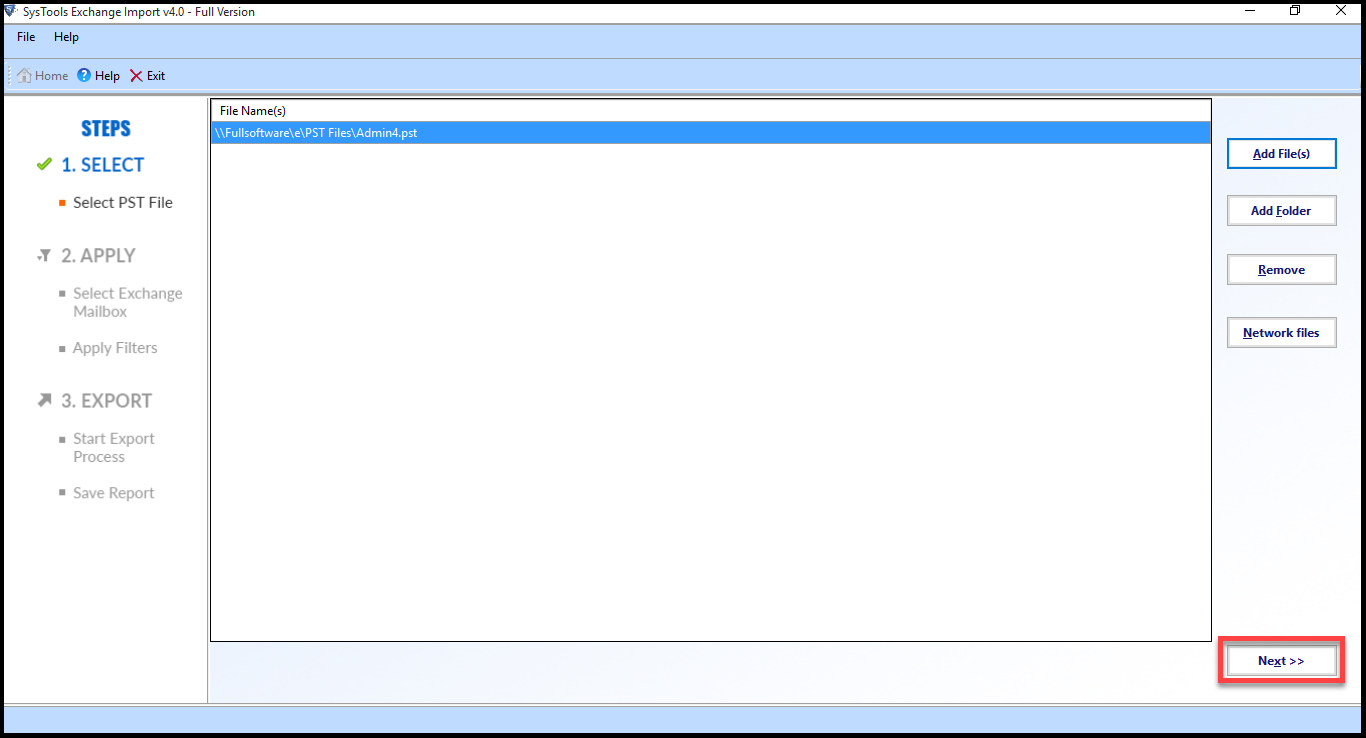
3. The chosen PST file will get added to the program. Click on Next.
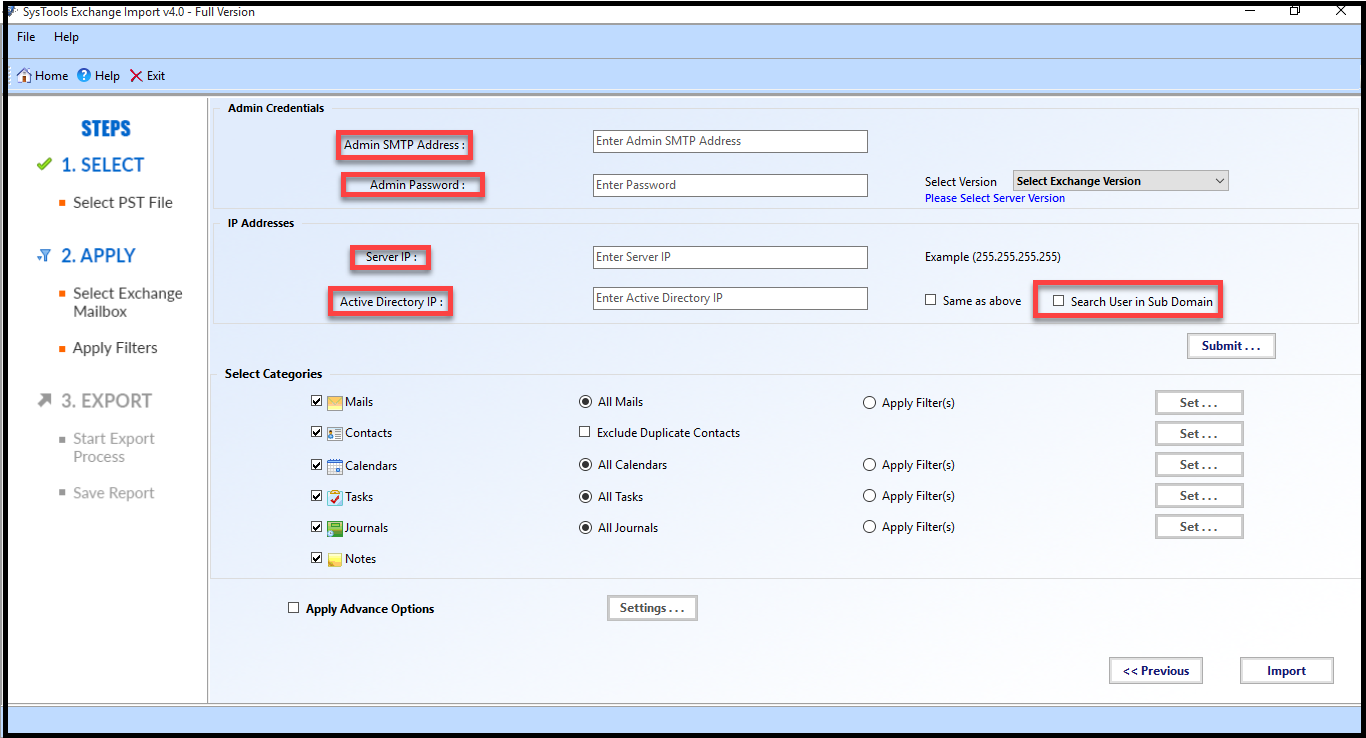
4. On the next page of the program window, enter the credentials of the Admin account of Exchange Server 2016. Also, enter the IP address of Active Directory and Exchange Server.
In order to import sub-domain users’ mailboxes, check “Search User in Sub Domain” option. After providing all required information, click on the Submit button.
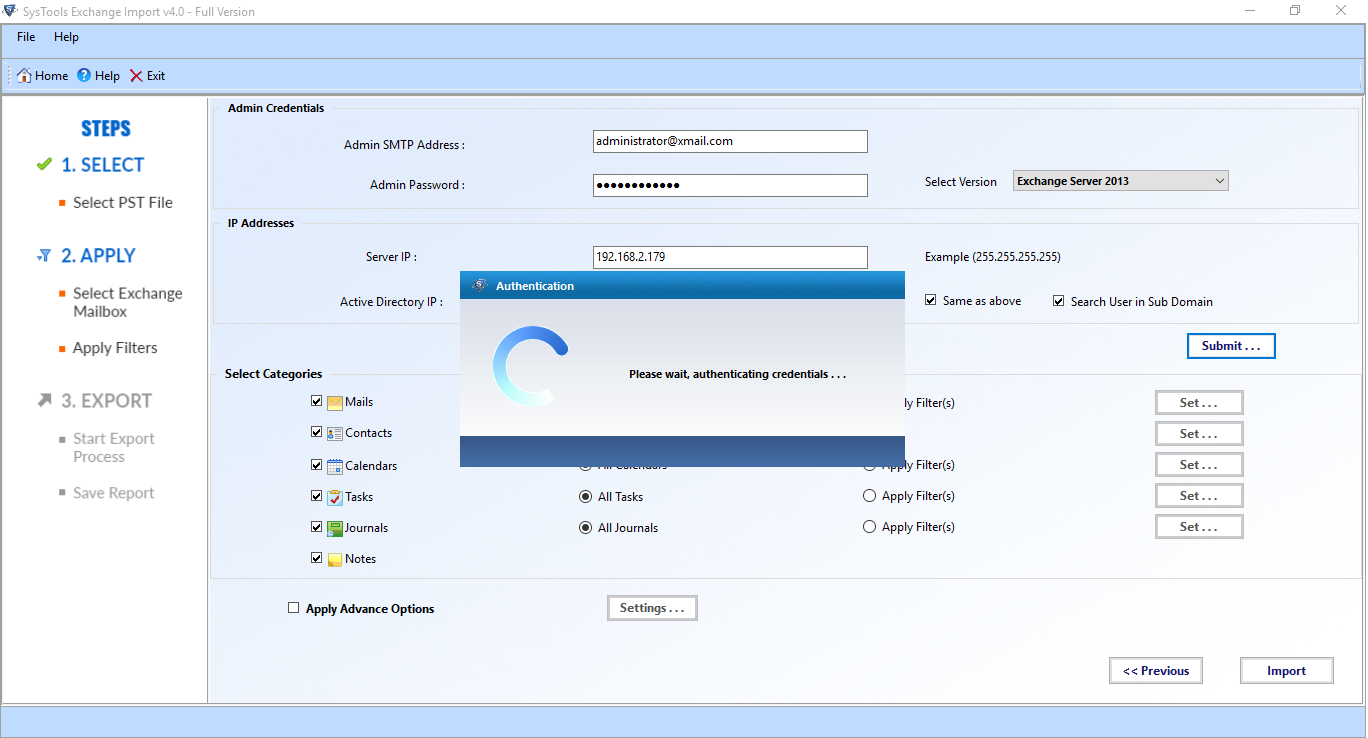
5. At this point, the software will Authenticate Credentials.
6. Provide credentials of the mailbox where you need to migrate the PST file and select the name of the mailbox where users want to migrate the PST file.
7. The software will authenticate the mailbox name. If it is not possible to authentic, the process will not go any further.
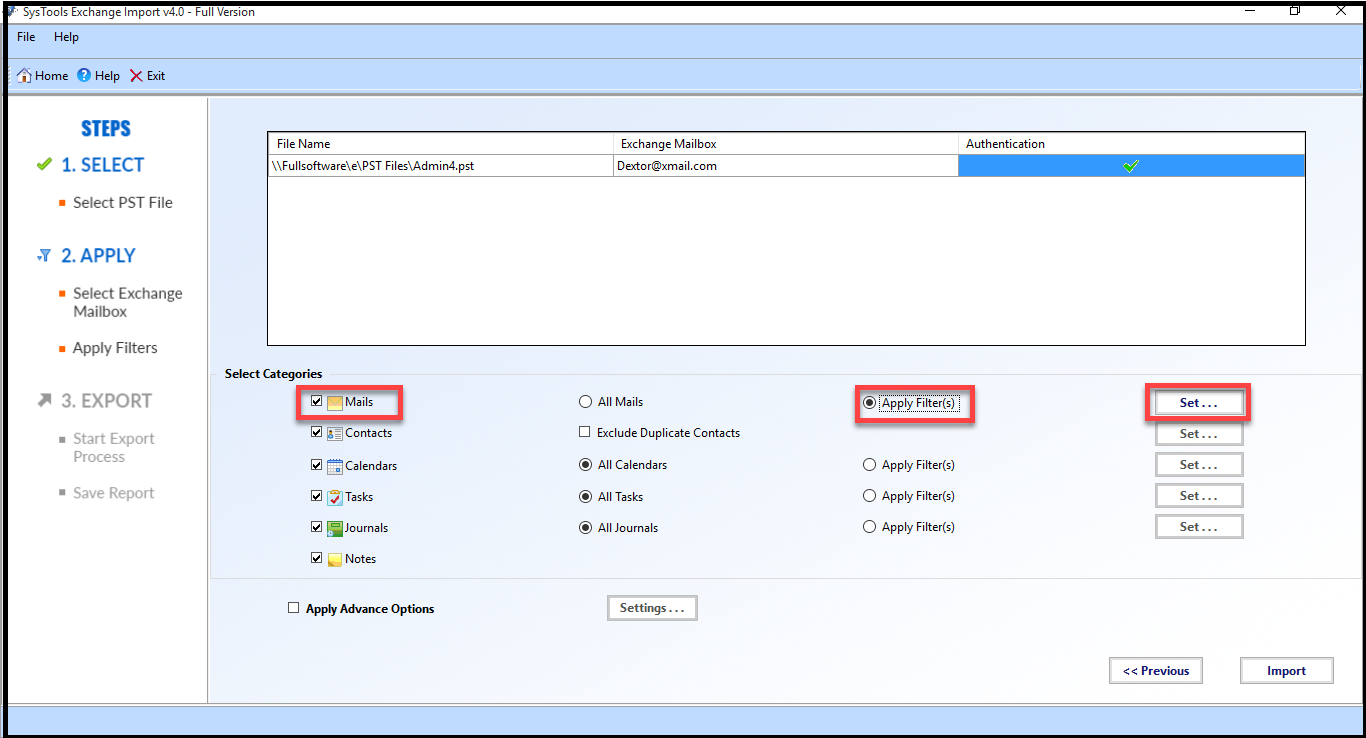
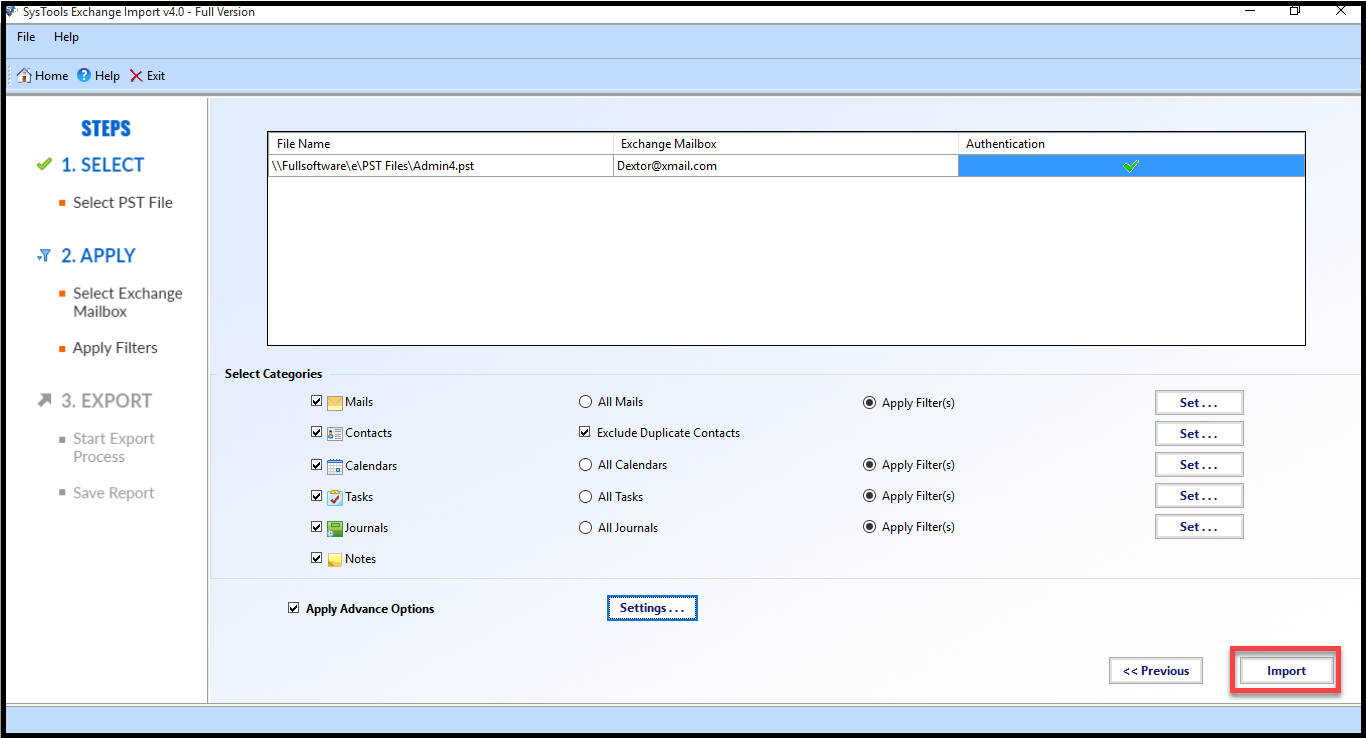
8. Once the authentication is done, users can Apply filters. To apply the filter for Mails option, select Apply Filter(s) radio button and click Set. Input the date range of your choice and click Apply.
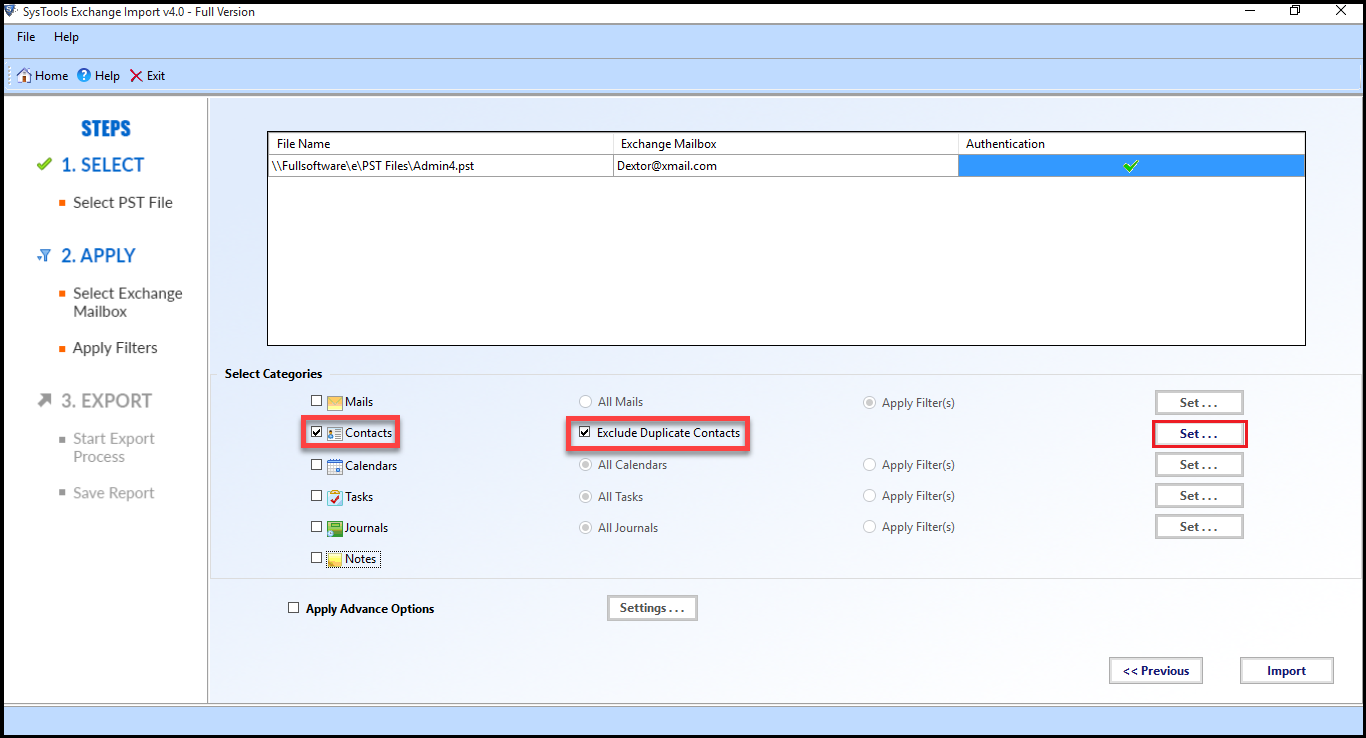
9) For contacts, select Contact, tick “Exclude Duplicate contacts” checkbox and click Set. Select which fields to be considered for checking duplicates and click on Apply.
Note: To filter Calendar, click Apply filter(s) radio button>> Set. Select Date range of the calendar entries and click Apply. For Tasks and Journals, follow the process same as Calendar.
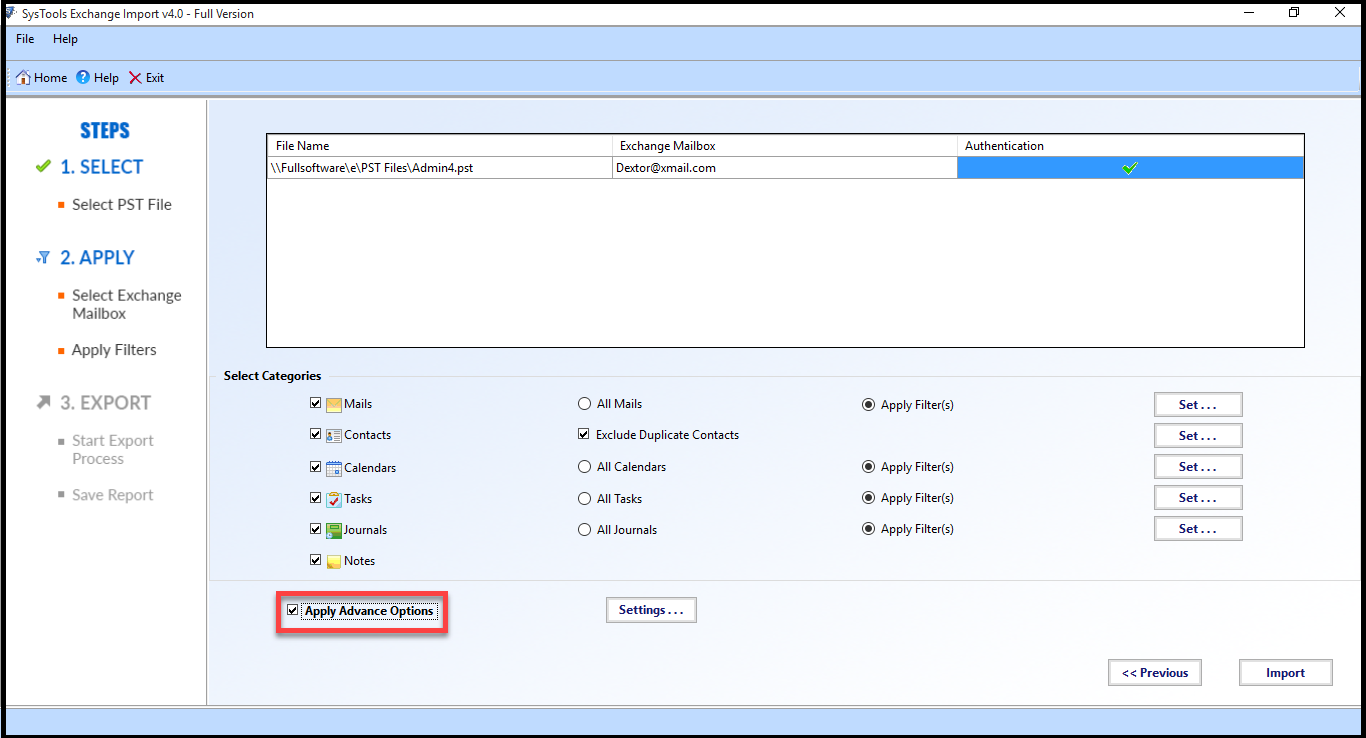
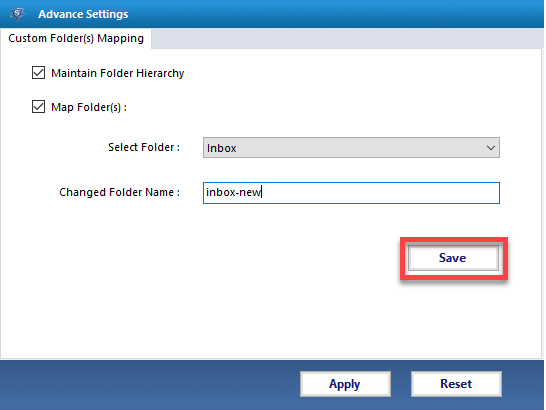
10. Users can also tick the “Apply Advanced Option.” Then they will get other options for more sophisticated import. On the Advanced Settings page, there will be two options. One is for maintaining folder hierarchy and another is for mapping folders. Users can check the options and click Save. Then click OK on the notification message and then click Apply.
11. On the Advanced Settings page, there will be two options. One is for Maintaining Folder Hierarchy and another is for mapping folders. Users can check the options and click Save. Then click OK on the notification message and then click Apply.
12. Users will return to the import page of the software. Click on Import to start importing PST file to MS Exchange
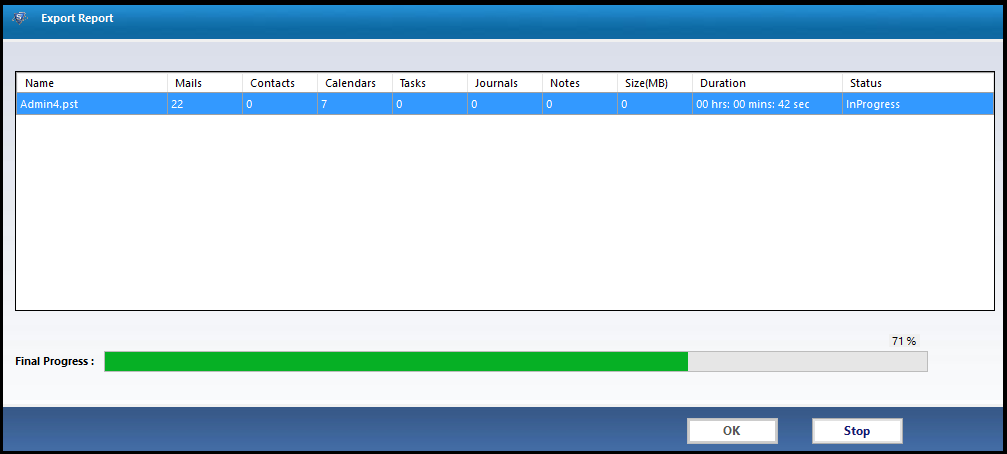
12. The process of importing Outlook PST file to Exchange 2016 will begin. Users can keep track of the progress of the procedure with the help of the Live Status Report.
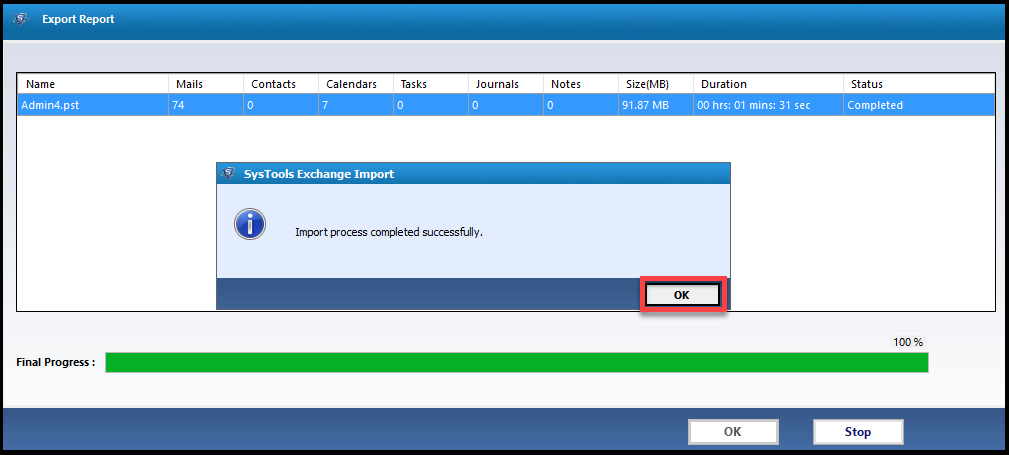
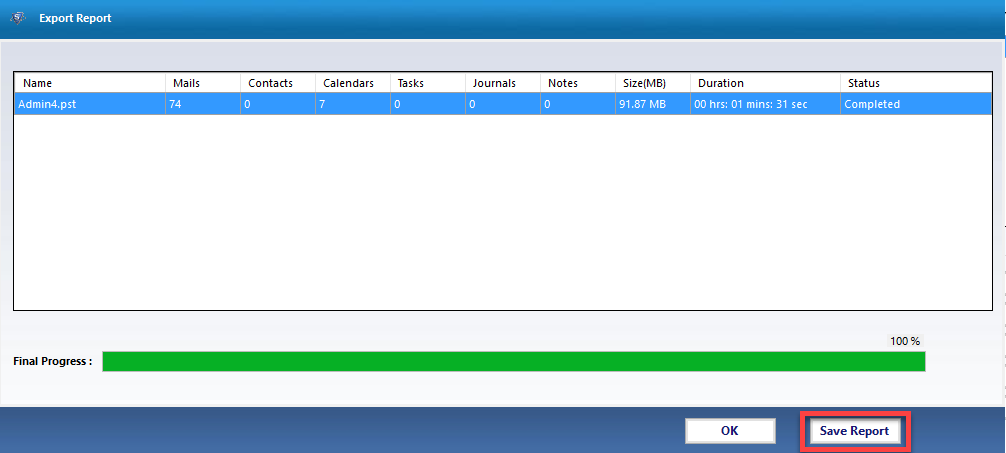
13. After the completion of the export process, users get a notification. Click OK to discard the message.
14. Users will be taken back to the import report. Click Save Report button to store it for future reference.
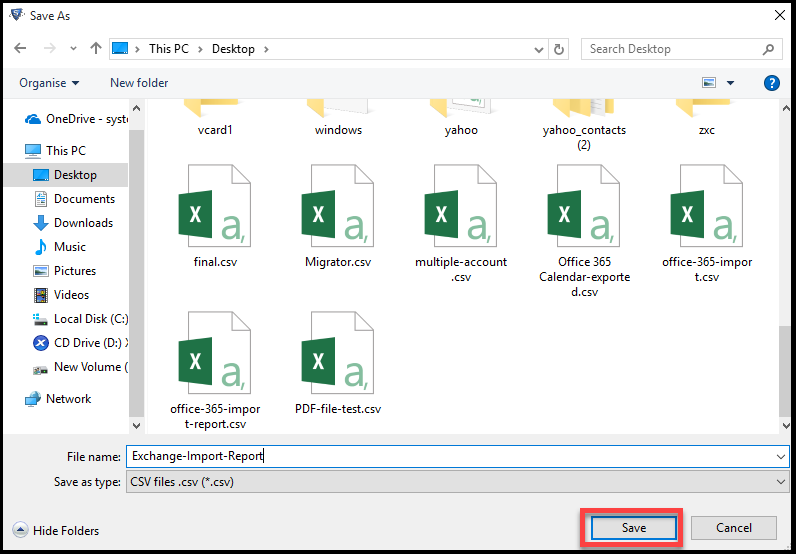
15. Select the location for the report and click Save
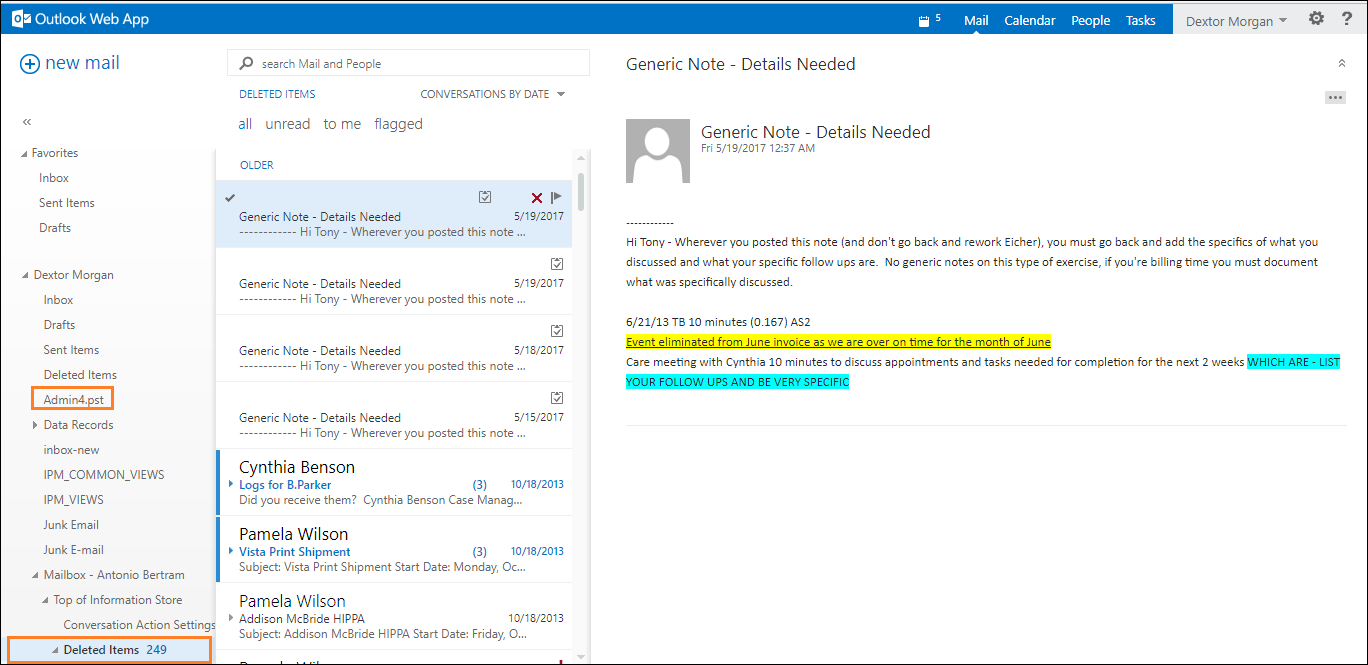
16. To confirm the complete import process, users can visit OWA and see that PST file has been migrated to their mailbox without any trouble.
Concluding Words
Where Exchange Administrative knows, how to import PST File to Exchange 2016 Mailbox using Powershell Command and Exchange Admin Center but this article deal with an automated solution to move Outlook PST File format to Exchange mailboxes of different versions used by different administrator such as 2016, 2013, and older versions 2010, 2007,2010. Wit SysTools Exchange Importer can import PST files to Live Exchange Server 2016 with ease. Users do not need to go through the lengthy and complex manual method if they try this utilit.
