Get Assistance to Create an Email Signature Using a Transport Rule in Office 365


Rather than depending on each employee for taking charge of their personal signature design, admins prefer adding a unique template from one central enterprise. Microsoft Office 365 administrators are having complete permission to create an email signature using a transport rule in Office 365 for employees of their respective firm via the EAC O365. The procedure involves two major steps to be performed i.e., Create an HTML file of email signature and Apply an HTML file to Outgoing messages through a Transport Rule.
What Are Transport Rules in O365?
In general, Office 365 transport rules (also named as mail flow rules) search for particular situations within the messages that are to be sent outside from your company and apply an action, which is defined by you. They are quite similar to the inbox rules used by several email clients like Microsoft Outlook but, a Transport Rule takes actions on the email when it is just going to be delivered. There are the large set of exceptions, conditions, and actions in Office 365 mail flow rules, benefiting users with the bundle of options associated with messaging policy.
These rules are utilized widely for organization compliance and security requirements. For example – you decide to block an individual from receiving messages with attachments because of some security purpose. In such case, you can create an email signature using a transport rule in Office 365 for blocking all emails with attachments sent to and from that specific individual. An action can also be defined with this rule in which recipient is sent a notification email through which he or she comes to know that ‘a message has been blocked because it comprises of an attachment’.
Another cause of using Office 365 transport rules comprise of filtering the confidential information, applying O365 email signature on all messages, and redirecting emails before their delivery.
Procedure to Create an Email Signature Using a Transport Rule in Office 365
Following instructions will guide administrators that how they can design Office 365 email signature via a Transport Rule :
- Create an HTML file for your email signature and save it in a text file format. You can refer official Microsoft blog website to get the formatting ideas. If you want an image to be included in the email signature, ensure that it is hosted on the location where recipients can see it.
- Go to https://portal.microsoftonline.com website and enter the Office 365 credentials. The account credentials will be the one where email signature is to be created.
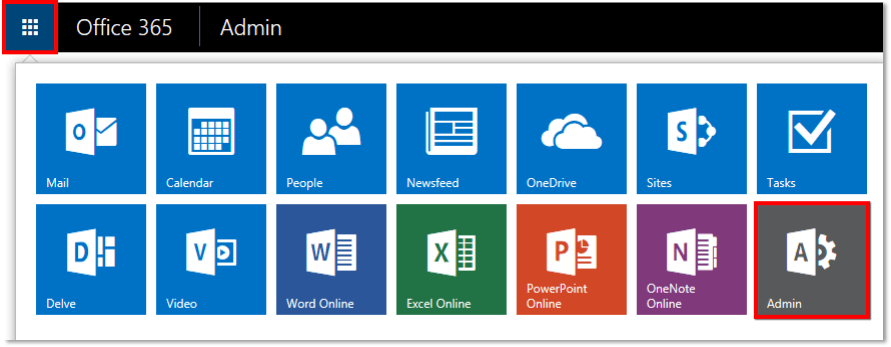
- On the Account Homepage, click on the nine dots icon and select Admin from the listed menu.
- This opens an Admin center where you have to choose Exchange to open its administrator page.
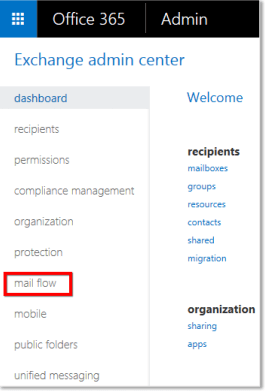
- Click on the Mail flow option from the left-hand side menu of the screen
- A row with different options appear where you have to click on rules
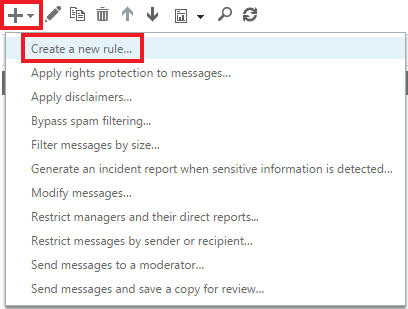
- Hit on the Add icon and from the displayed menu, click on Create a new rule
Note – You can also go for Apply disclaimers….. option if you want to utilize any one of the predefined O365 templates.
- Provide a simple name to this new rule in Name field.
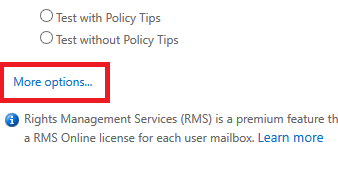
- Hit on the More Options… link because by default, all options will not get displayed to create an email signature using a transport rule in Office 365.
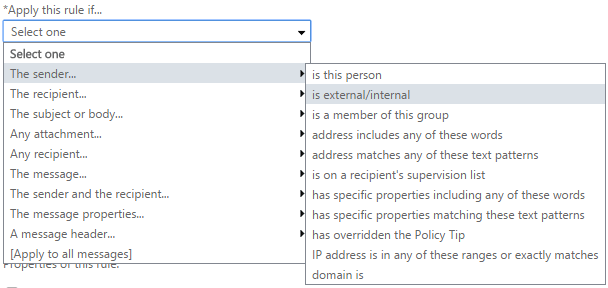
- Click on the drop-down button of Apply this rule if.. and select any one of the conditions, which you want to append. The condition will be dependent on the particular scenario when email signature is to be applied automatically.
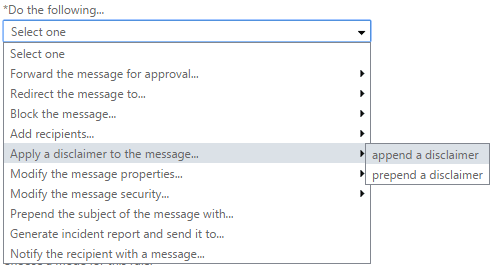
- Now to click on a drop-down button of Do the following…. and choose to Apply a disclaimer to the message… >> append a disclaimer.
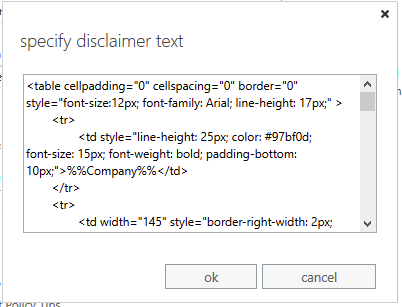
- Hit on the Enter text field and then, open the HTML file in which you have created email signature code
- Copy and paste that code into that particular text box and click on OK button
- Hit on Select One field for entering the fallback action on the event in which signature is not to be added in an email. There are the following three choices for the same :
Ignore – This sends the mail without adding the email signature
Wrap – Automatically adds the email signature to the new message.
Reject – Do not send email, a sender might encounter an NDR giving a message that it can be delivered.
- If want then, add an exception in Microsoft Office 365 email signature
- At last, click on Save button to end up with the entire procedure.
Conclusion
To create an email signature using a transport rule in Office 365 enables enterprises to set up and append a disclaimer in all the outbound as well as inbound messages. Remember one thing that instead of adding email signature via EAC, we are generating disclaimer. Microsoft O365 enables creating of plain-text disclaimer that appears as the mail signature.
