Tutorial to Configure A Shared Mailbox in Exchange 2016 / 2013 / 2010

In the Microsoft Exchange server, shared mailboxes are the standard mailboxes, which can be accessed by multiple users at a time. These mailboxes are utilized as a common space to enquire, program, or do projects. It might be possible that shared mailboxes have a user account associated with them. Well, different Exchange individuals around the world ask for the solution to configure a shared mailbox in Exchange 2016 / 2013 / 2010. This post is useful for such Microsoft clients who are seeking for the measure for adding a shared mailbox in Exchange 2010.
Measure to Create a Shared Mailbox in Exchange 2010 Using EMC
Begin with following instructions to configure a shared mailbox in Exchange 2010 / 2013 / 2016 server:
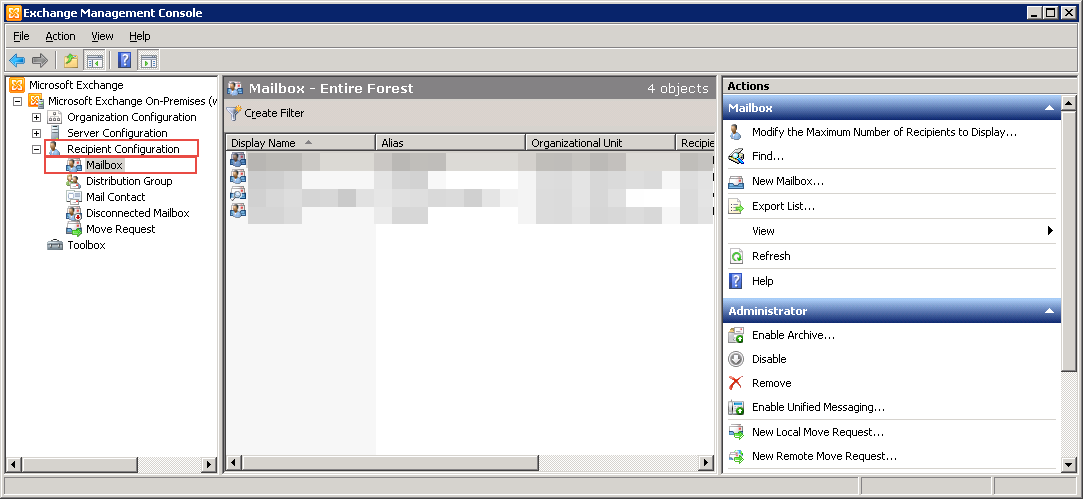
- Open Microsoft Exchange Management Console program and on the left-hand side of the panel, click on Recipient Configuration >> Mailbox.
- Click on the New-Mailbox, which is located under the Actions section.
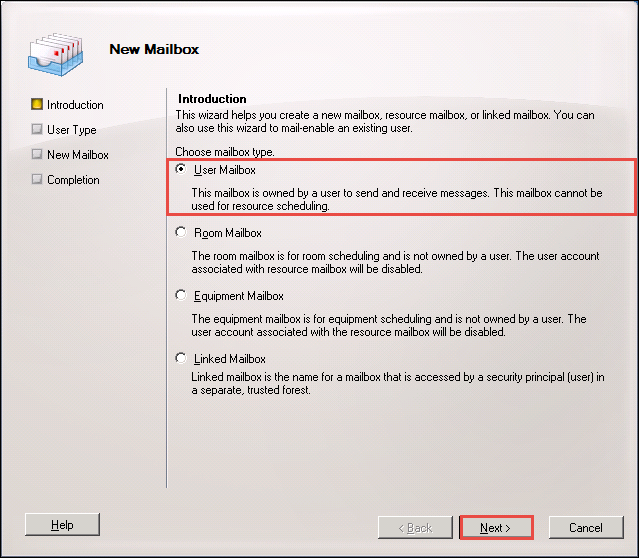
- This opens a New Mailbox window where you have to choose User Mailbox. Other types of the mailbox are also listed on the current screen but, to configure a shared mailbox in Exchange we will use User Mailbox type. Click on Next to continue
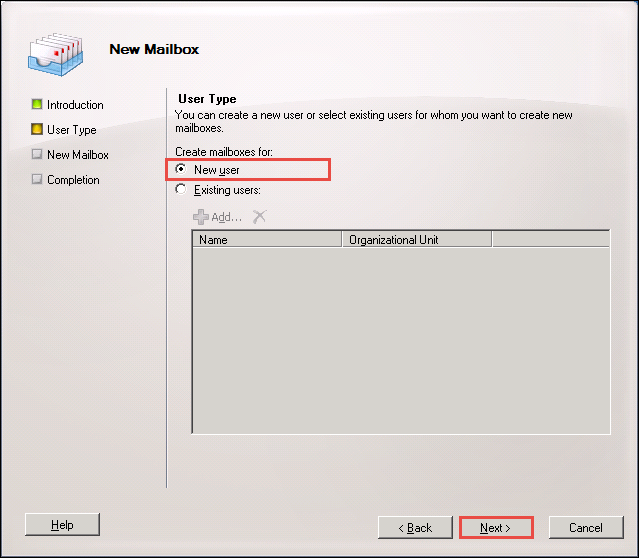
- Now enable the radio button of New User and click on Next
- Enter all the user information in the current window. It is optional to mention the organizational unit where the group needs to be created in the future. After finishing up with user information entering, hit on Next to create a shared mailbox in Exchange Server.
- It is time to the enter Exchange Alias name, which can also be a username. If you desire to mention the database and any retention / ActiveSync policies then, you can do the same in this step. To set up a shared mailbox in exchange, it will be better if you are not setting any policies or define a separate policy just for the shared mailbox. Once done with this, click on Next.
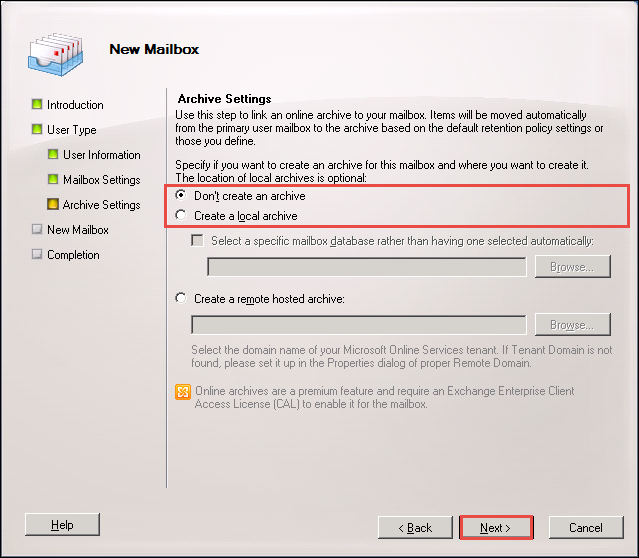
- Decide whether you want to include archive mailbox or not. Accordingly, enable any one of the 2 listed radio buttons and click on Next to proceed with adding a shared mailbox in Exchange 2010.
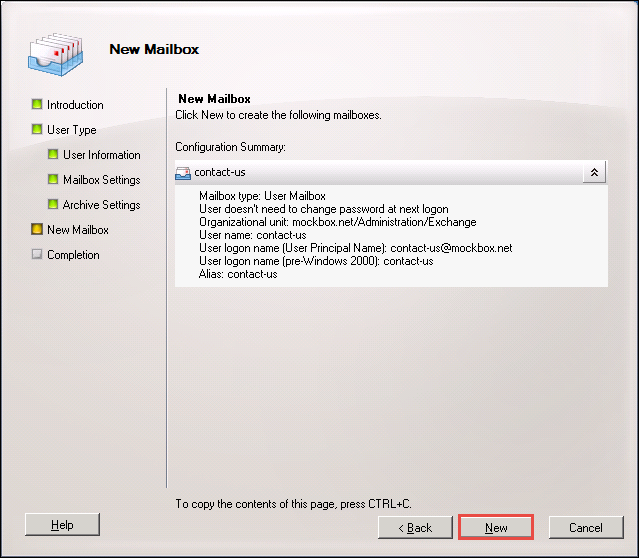
- A configuration summary displays in front of you where you can review all the settings to create a shared mailbox in Exchange Server 2010 / 2013 /2016.
- When you are satisfied with all the settings, click on New for starting with mailbox configuration
Till now, you are done with the creation of shared mailbox in Exchange server. Now with help of following guidelines, you will assign ‘full access permission’ to this mailbox :
- Open EMC and click on Recipient Configuration >> Mailbox
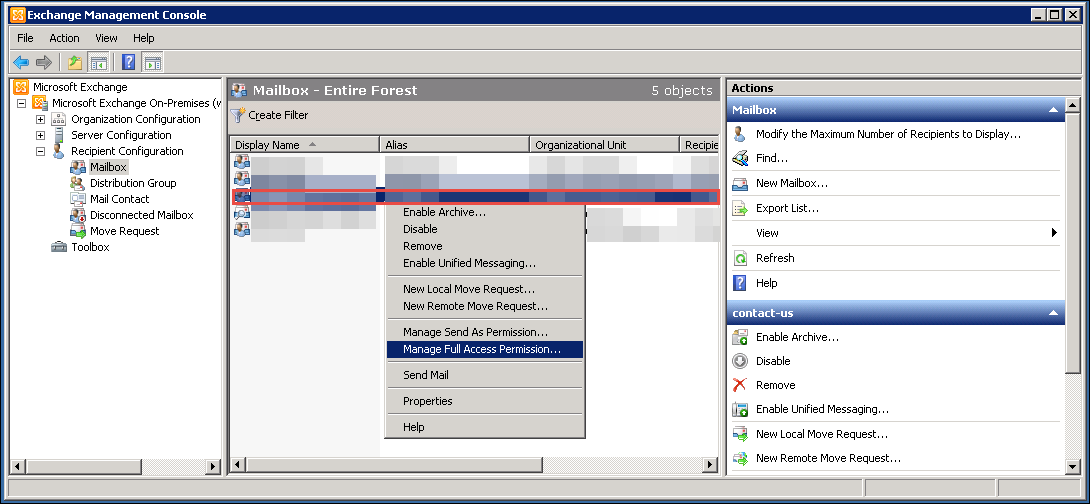
- Right-click on the mailbox, which you recently created for sharing the purpose
- A list with different options appears in which you have to choose to Manage Full Access Permissions option.
- This opens a Manage Full Access Permission window in which you have to click on Add button.
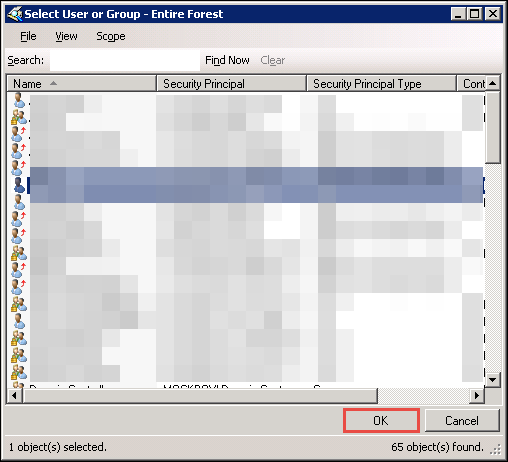
- Make use of Select User or Group window in searching the required user. When the desired user appears in front of you, click on OK.
- At last, click on the Manage button to complete with the entire procedure to create a shared mailbox in Exchange Server with full access permission.
Conclusion
Microsoft Exchange administrator can refer this guide to configure a shared mailbox in Exchange 2010 /2013 / 2016. This sharing functionality is useful in large enterprises where one mailbox acts as a resource for different Exchange users. Totally, it is the decision of the admin to determine that whom he or she wants to give permissions for adding a shared mailbox in Exchange 2010


